
 X
X Facebook
 Discord
 Instagram
 YouTube
 ChatGPT
Order Blocks
Order Blocks are price zones where institutions place massive buy or sell orders.
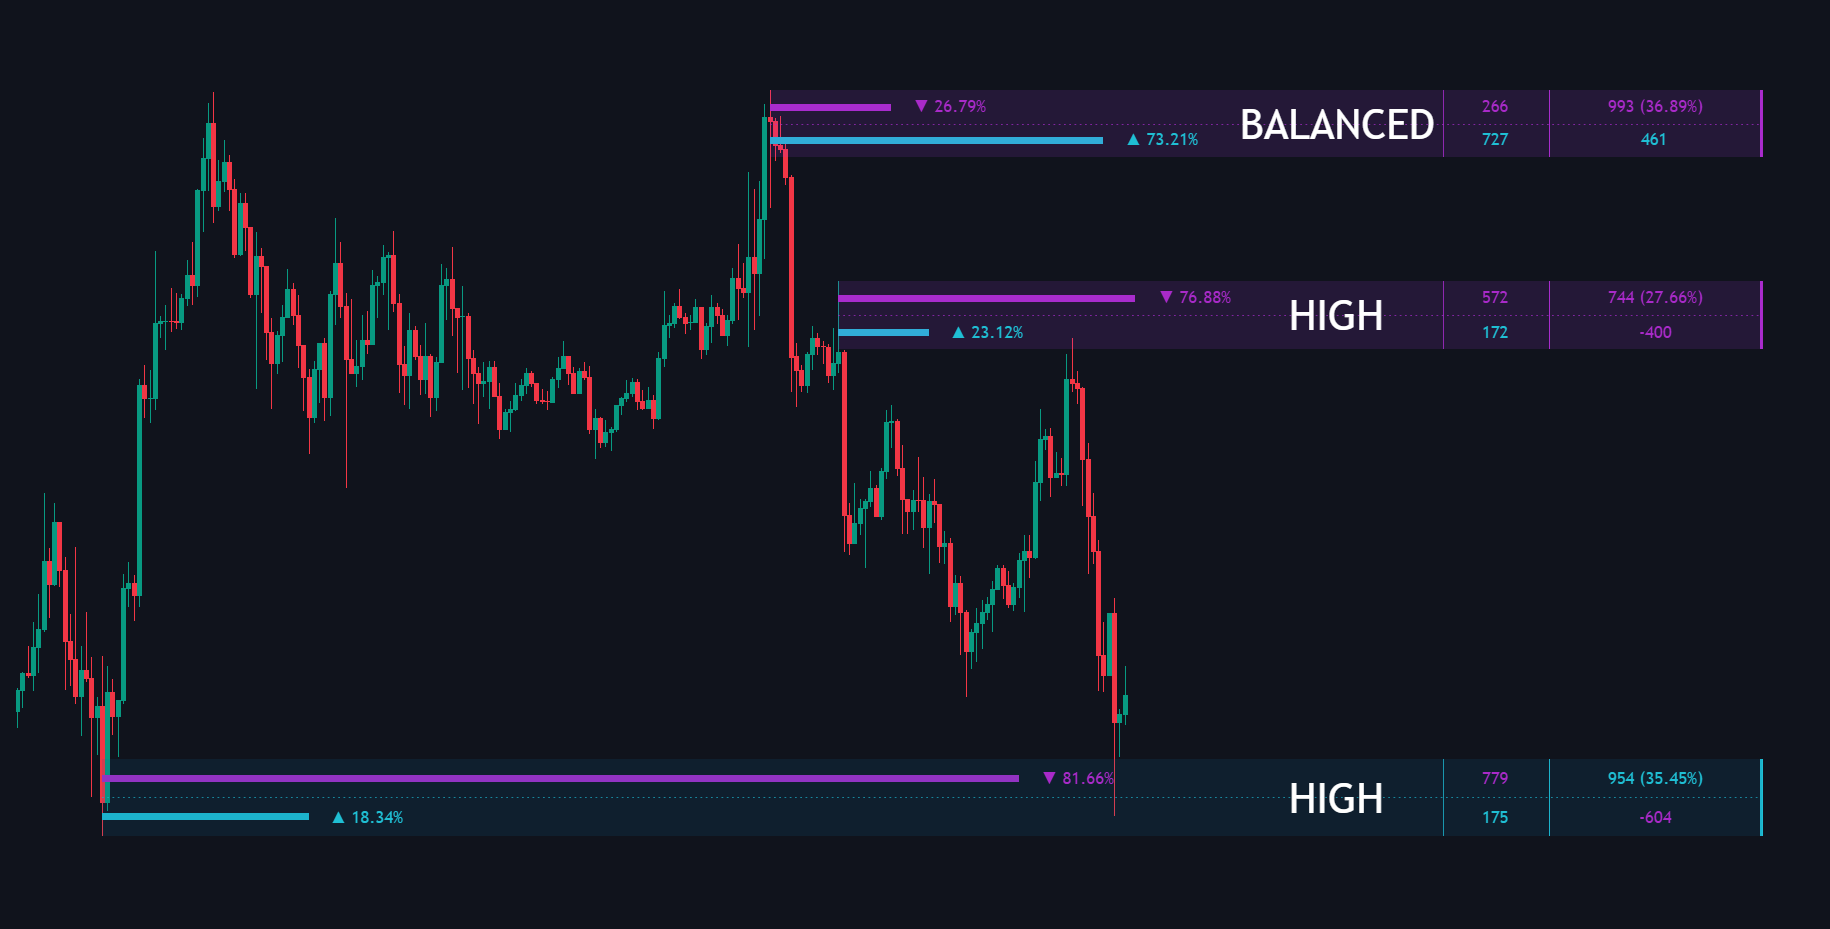
When price returns to these zones, it usually reacts strongly, giving you high-probability entry setups.
- Bullish Order Block: A zone where big players bought. Look for buying setups here.
- Bearish Order Block: A zone where big players sold. Look for selling setups here.
Volume ratio bars
Every Order Block on your chart shows two colored bars. These show you the exact volume breakdown inside the zone:
Bullish Volume Bar:
Shows the percentage of aggressive buying volume within the block.

Bearish Volume Bar:
Shows the percentage of aggressive selling volume within the block.

Rating Bar
The rating bar gives you a quick visual summary of the zone's overall health and trading potential:
Score: It grades the Order Block based on volume, momentum, and how fast price left the zone.
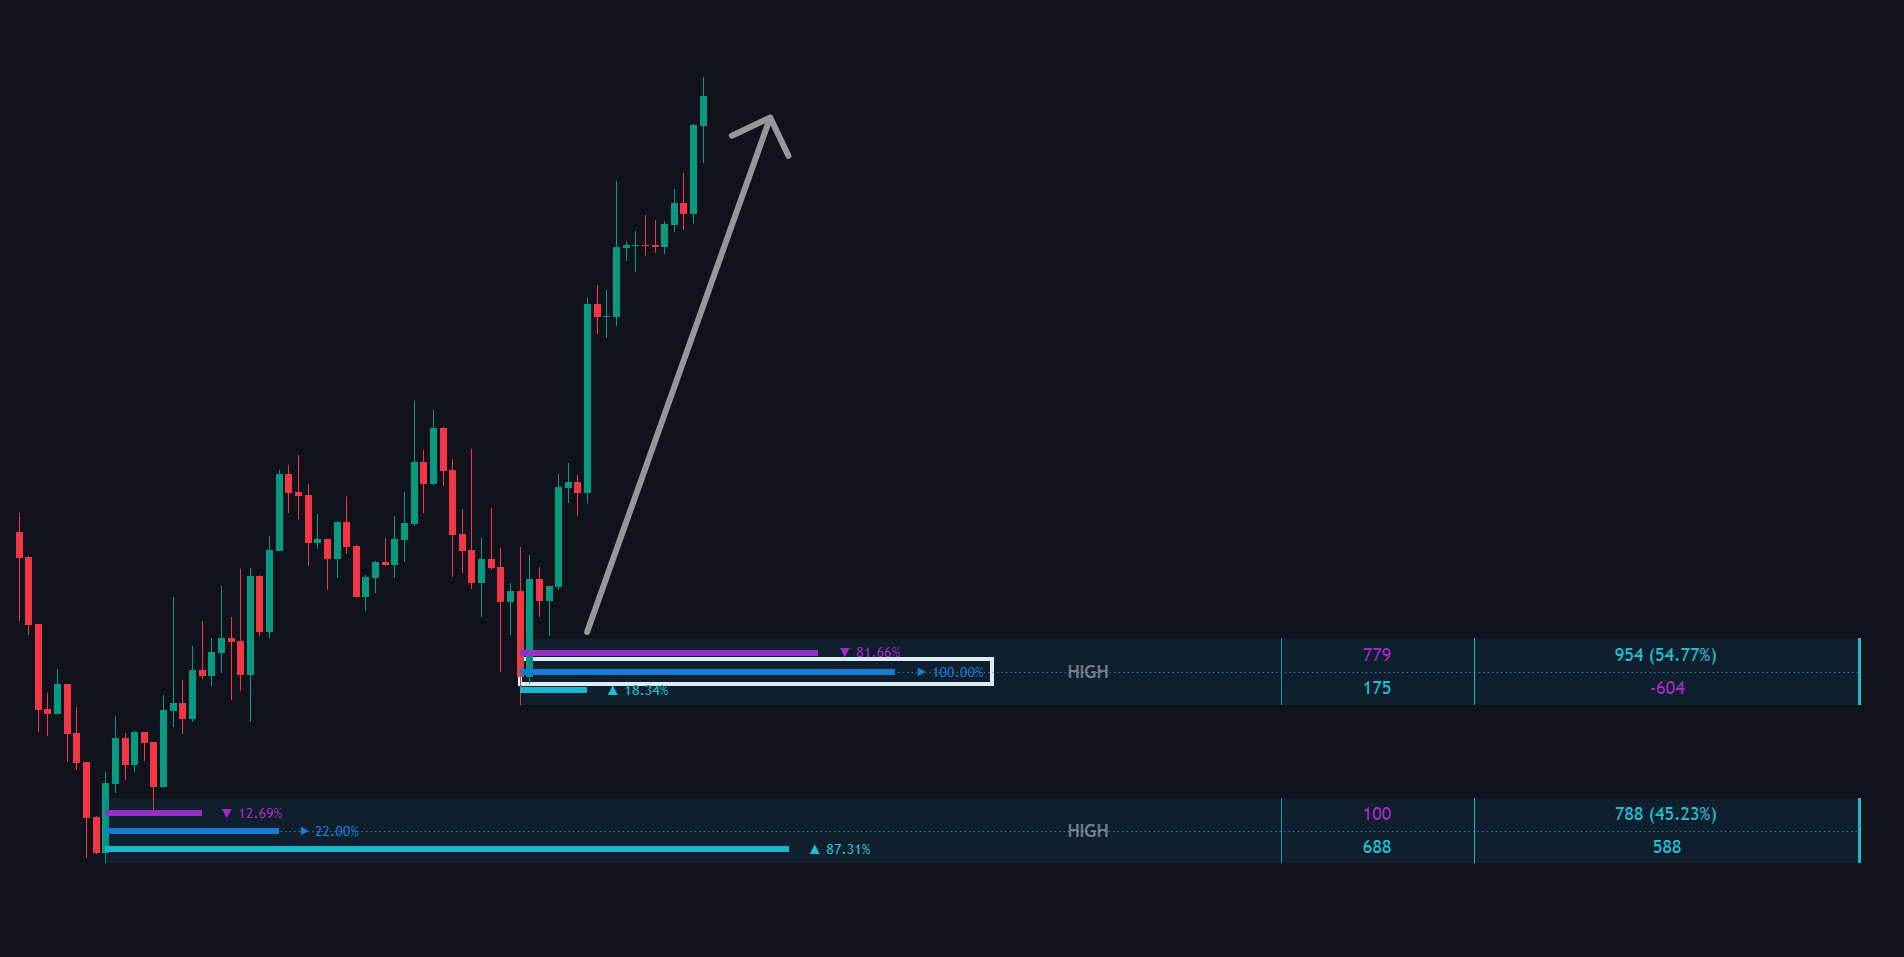
Total volume and delta volume
Total Volume (Top Number):
Shows the total amount of trading activity inside the block, plus its percentage share compared to other blocks.

Delta Volume (Bottom Number):
Shows who won the battle inside the block.

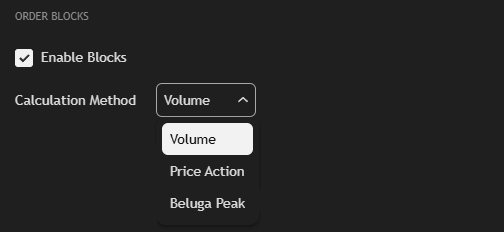
Calculation Method
The Calculation Method setting allows you to define the underlying logic used to identify and filter Order Blocks. This flexibility ensures that the toolkit can adapt to different market conditions and trading styles—whether you prioritize heavy institutional participation or pure structural price shifts.
Volume Mode
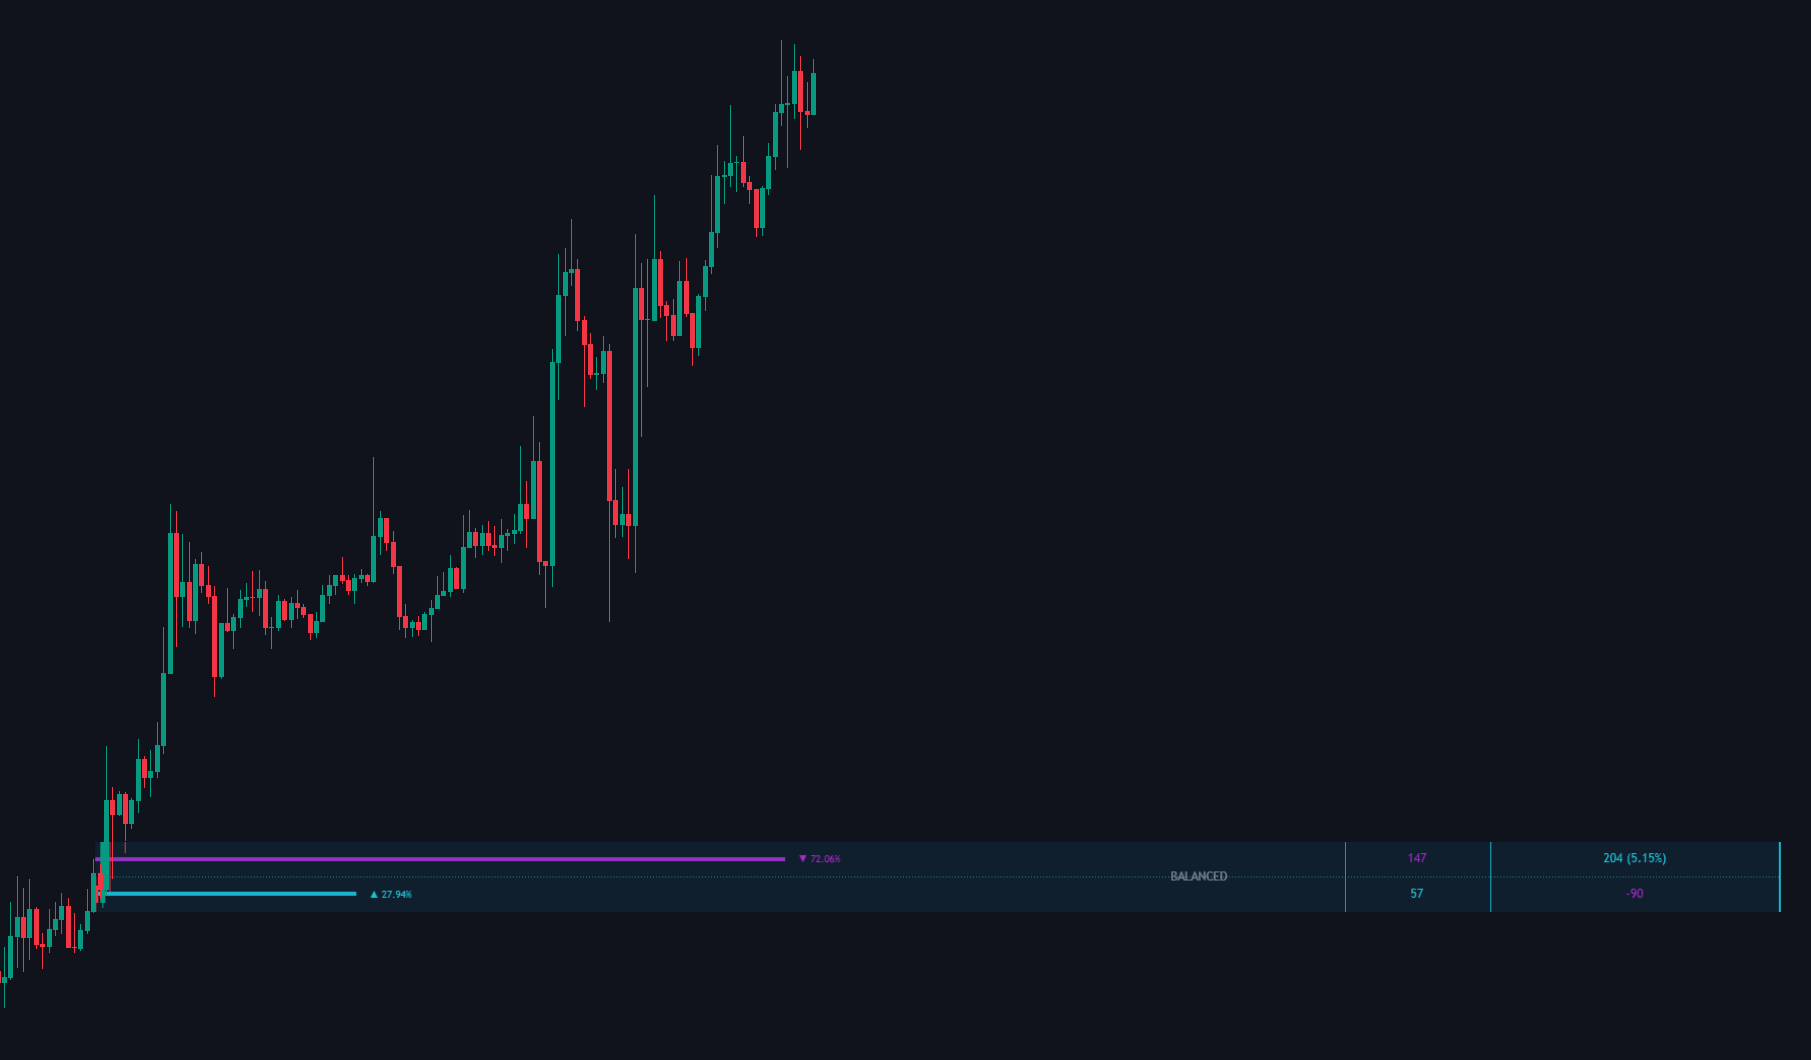
What it does: Finds zones where the most physical money changed hands right before a major price move.
Price Action Mode
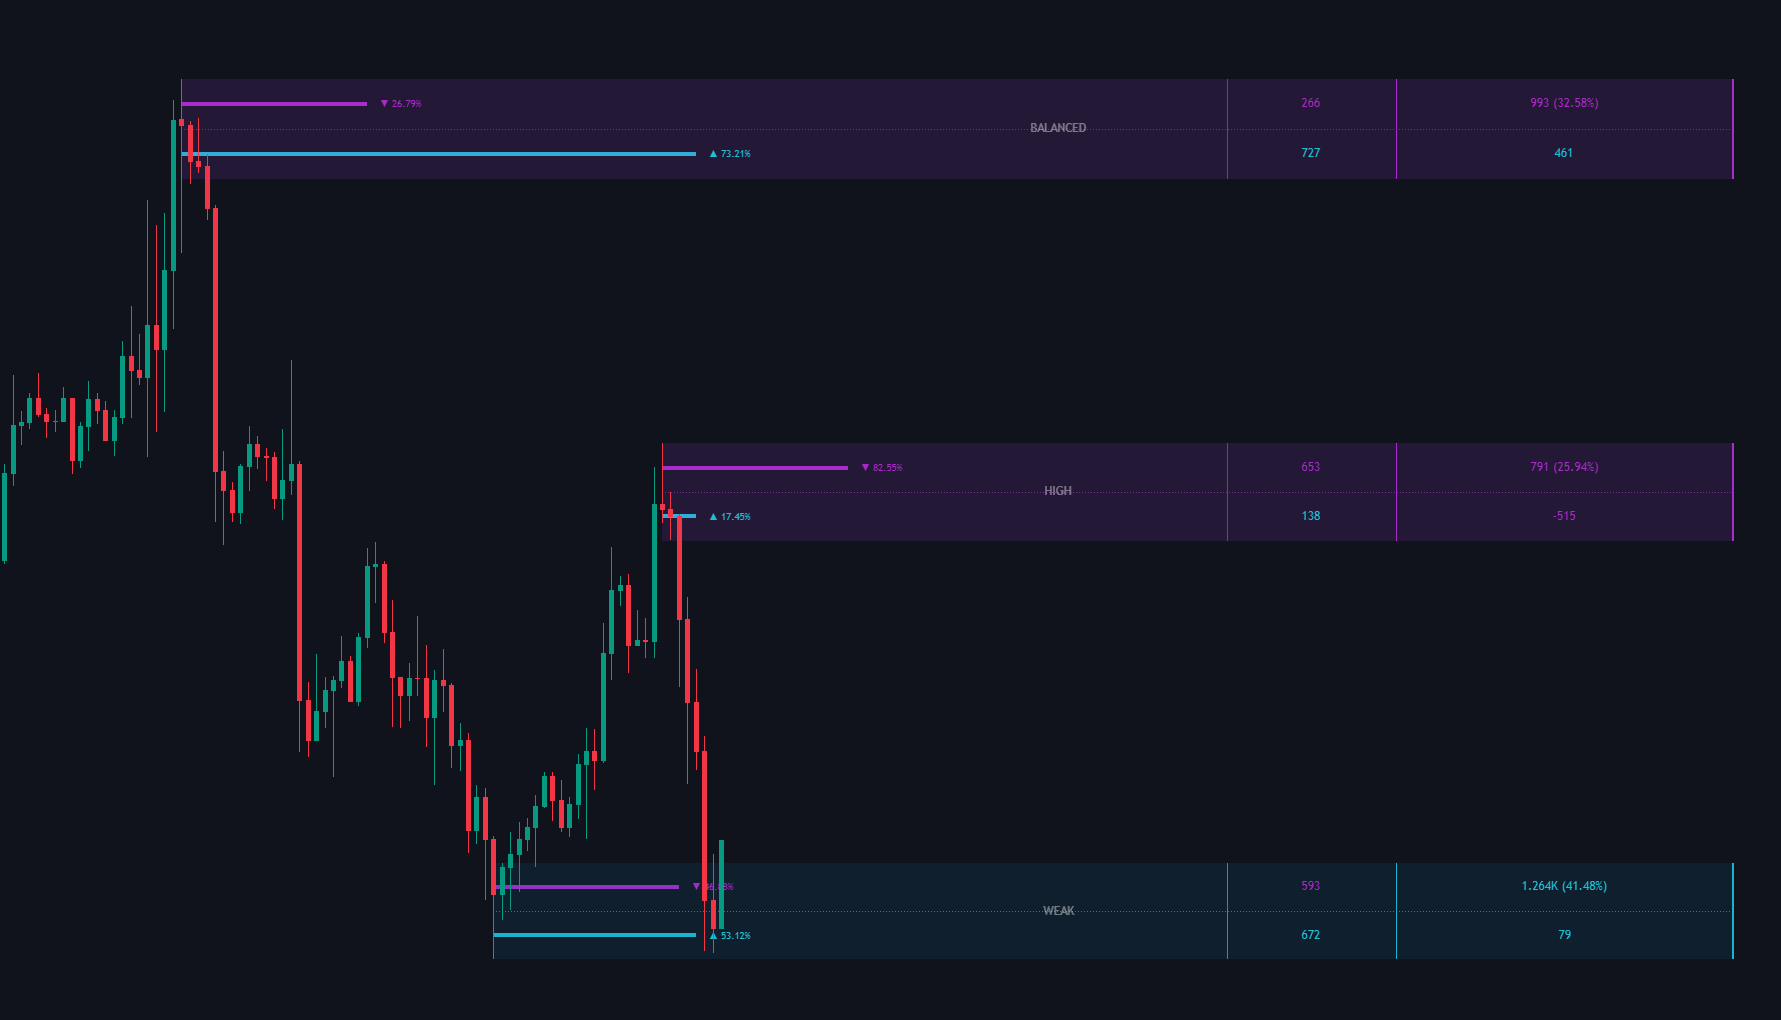
What it does: Focuses purely on major structural breaks, trend shifts, and fast price expansions.
Beluga Peak Mode
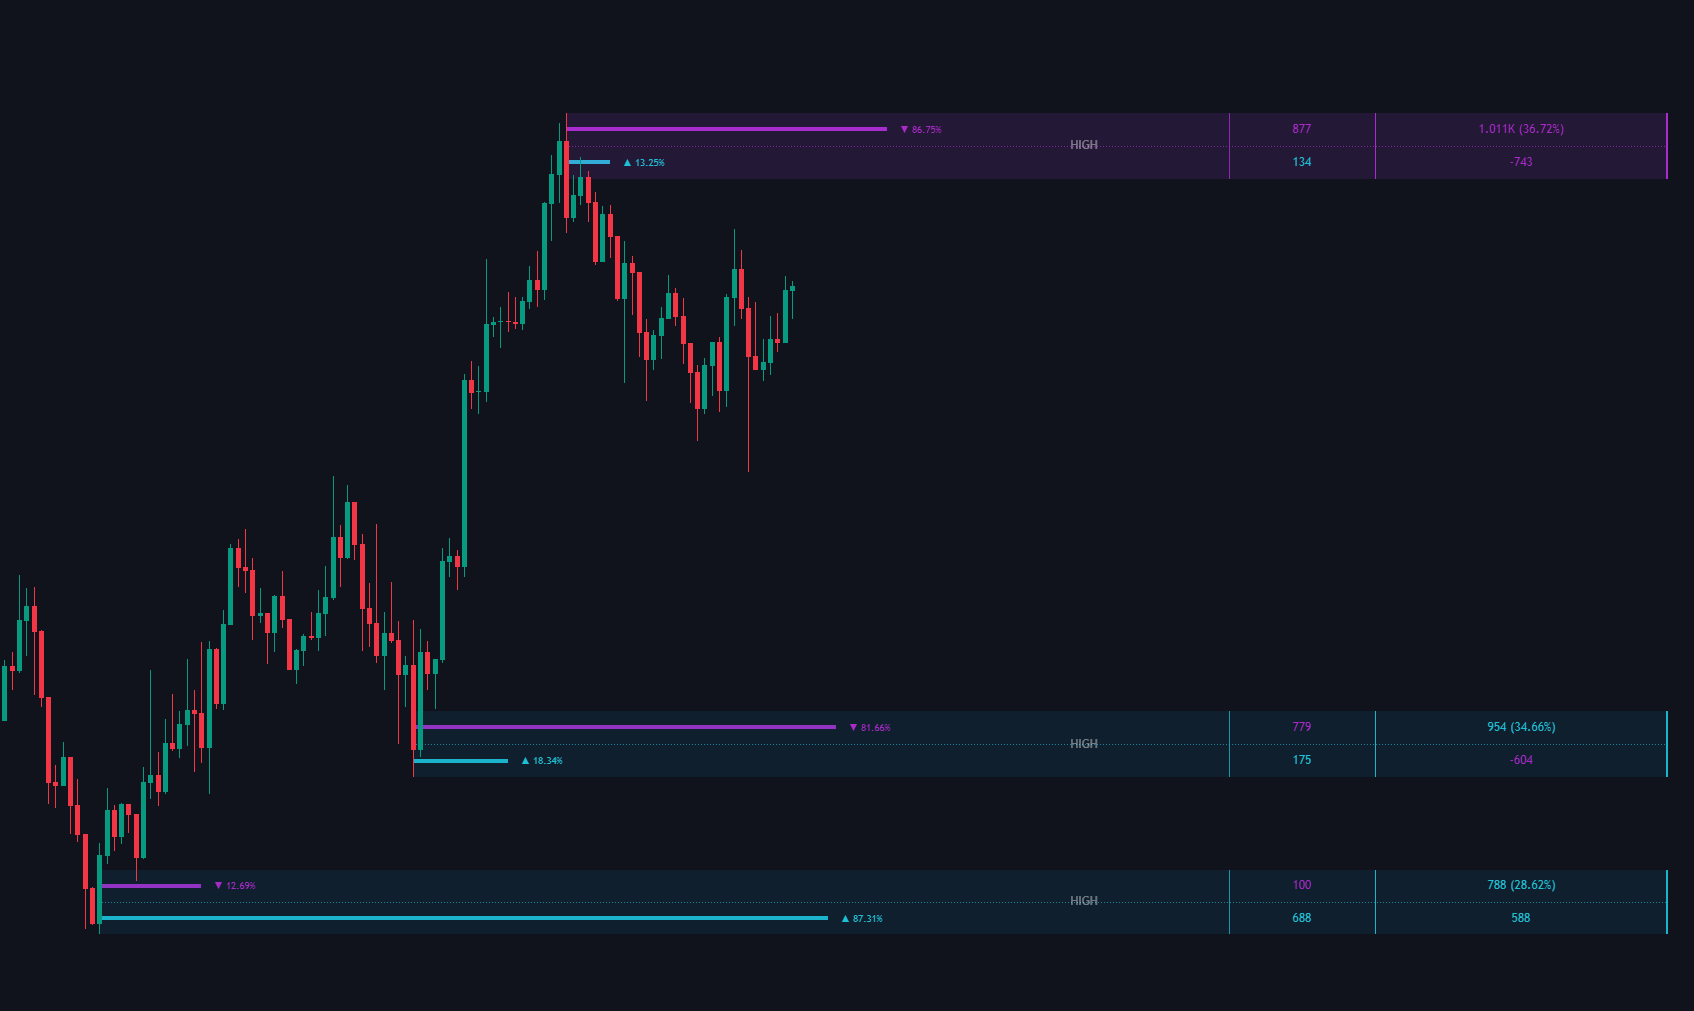
What it does: Pinpoints the exact "sweet spot" where price exhausted and aggressively reversed.
Categorization
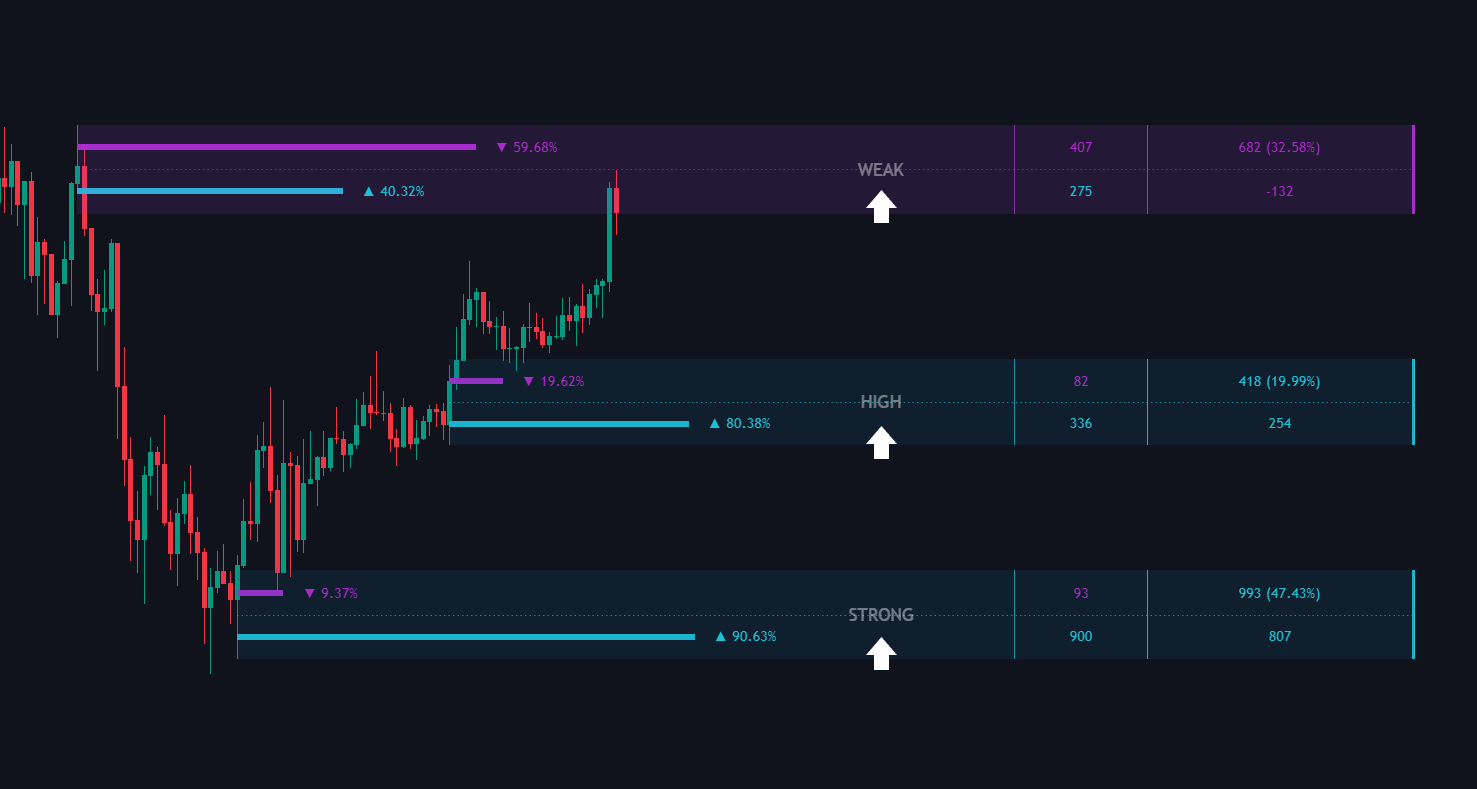
Based on Total volume and delta volume order blocks are categorized into High, Balanced and Strong blocks for easy identification of significant levels

Breaker Blocks
Breaker Blocks are old support or resistance levels that got broken.
Once broken, they flip. The tool tracks these flipped zones because they act like a magnet for price, offering high-probability entry points on a retest.
Bullish Breaker Block
An old supply zone (resistance) that price broke above. It now flips into a strong support zone to buy from on a pullback.
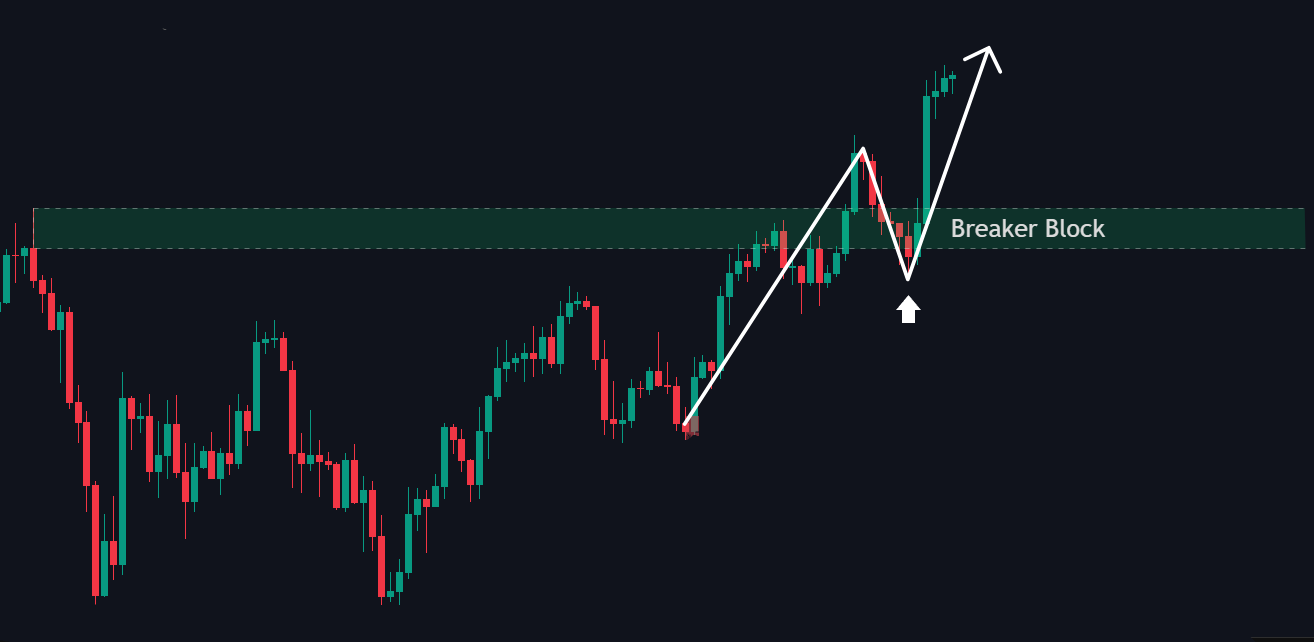
Bullish Breaker Block
Bearish Breaker Block
An old demand zone (support) that price broke below. It now flips into a strong resistance zone to sell from on a pullback.
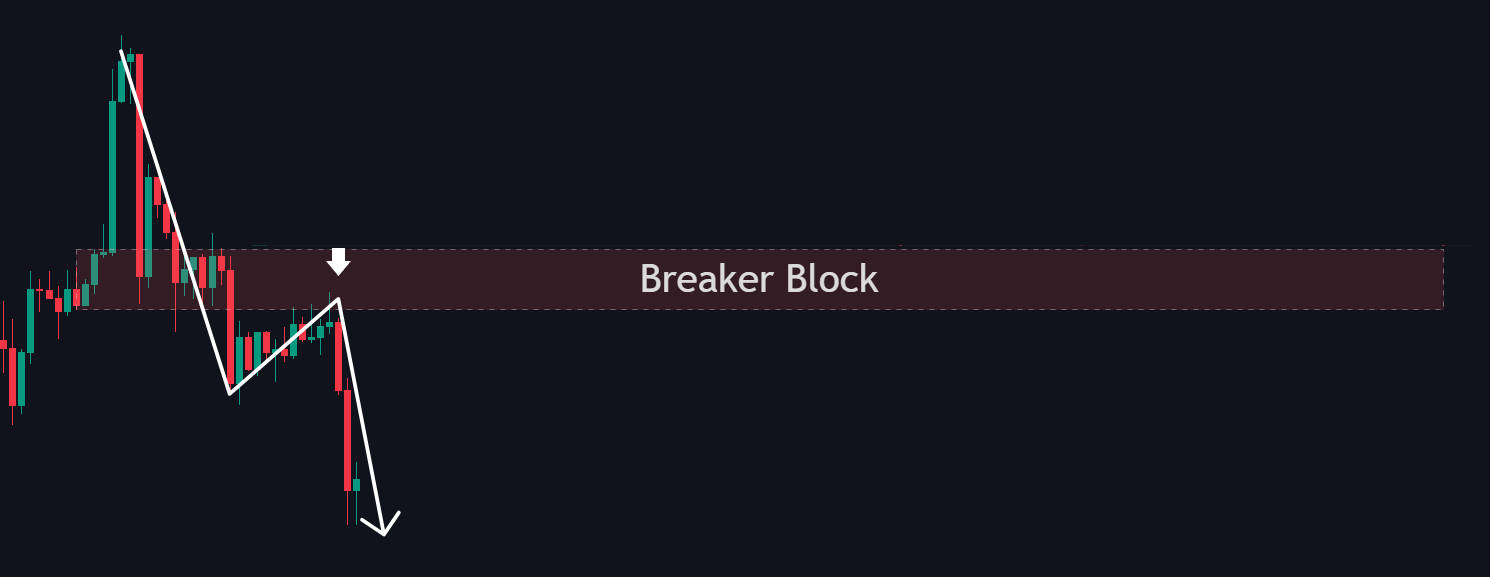
Bearish Breaker Block
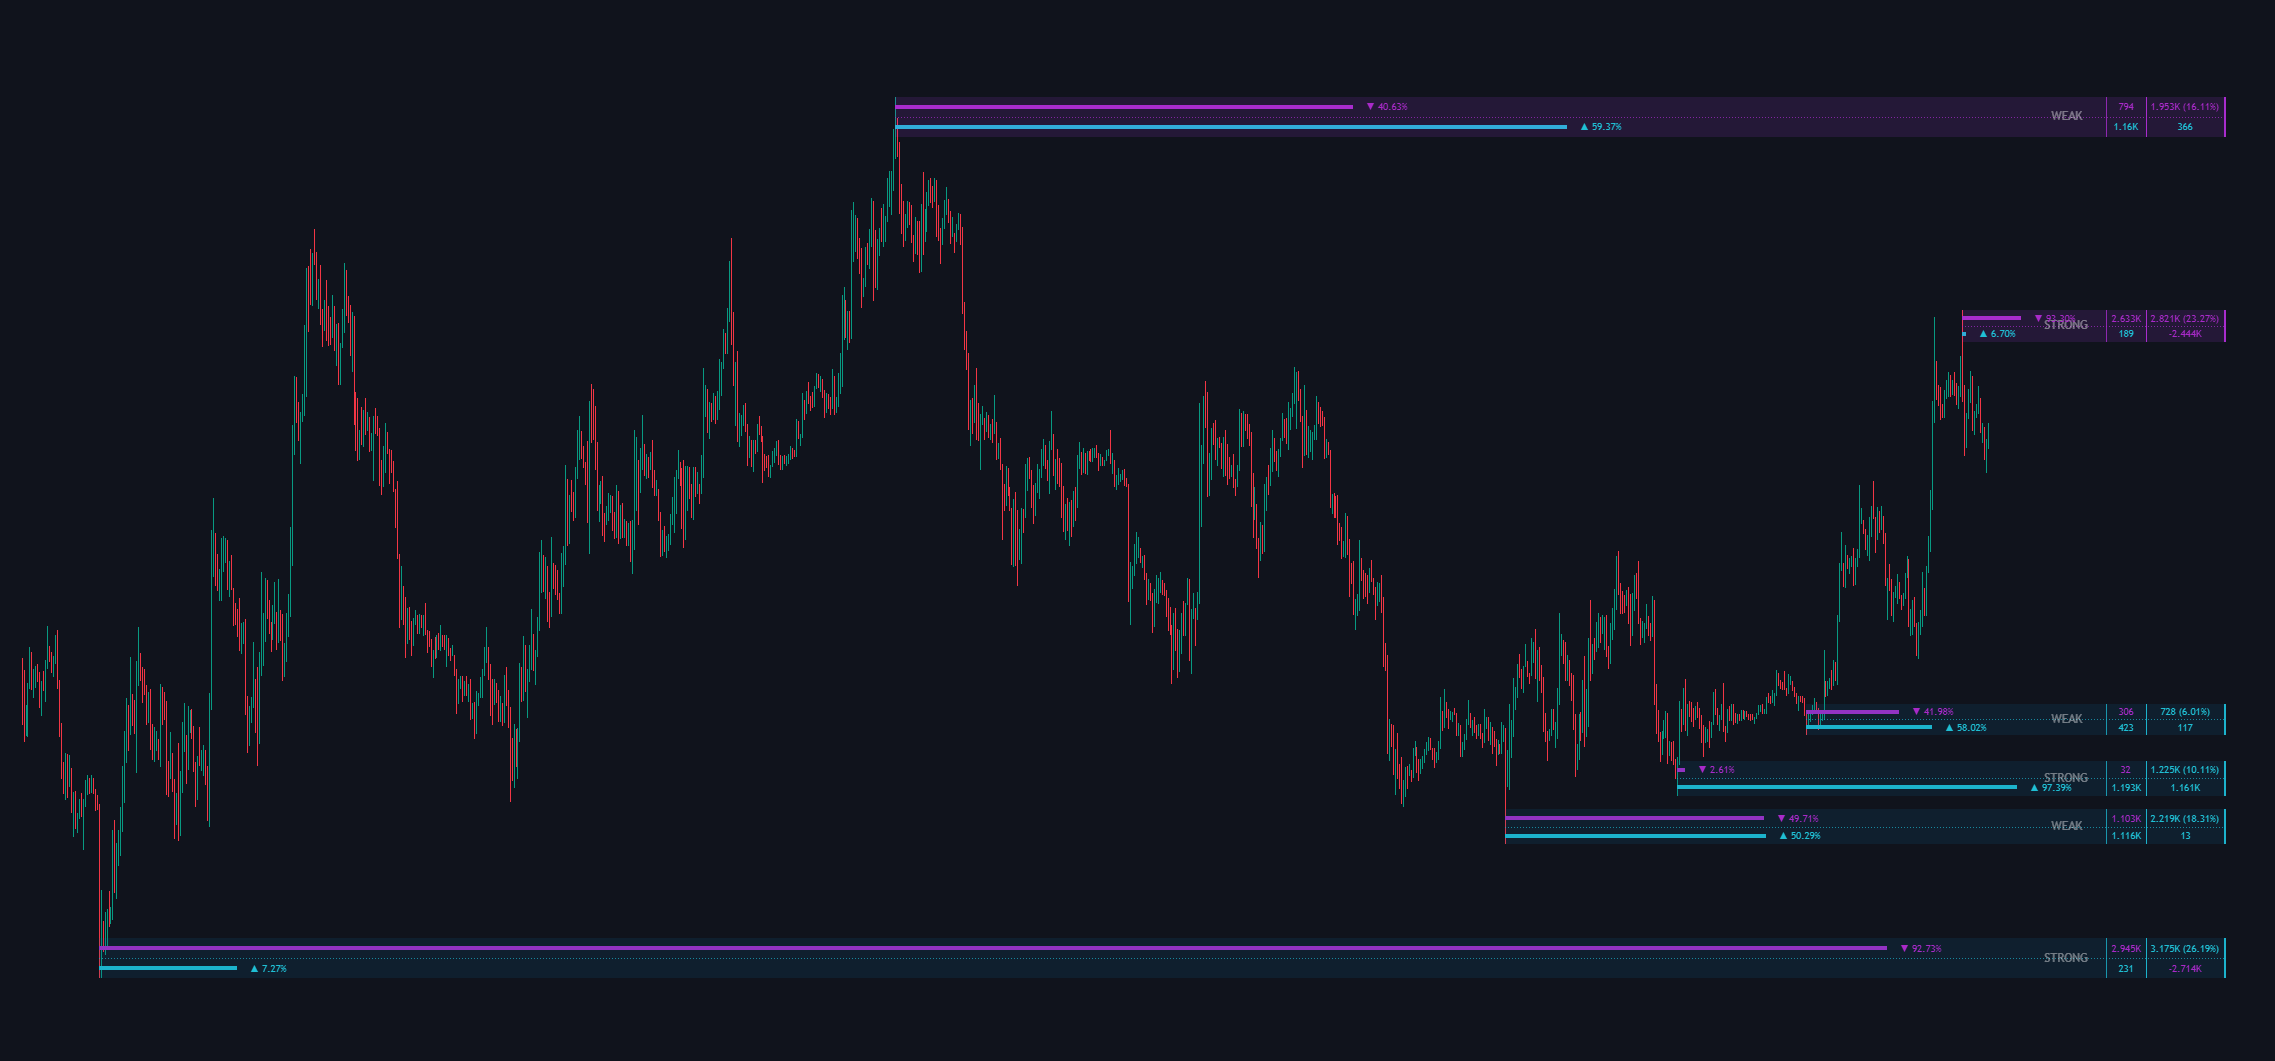
Macro Order Blocks
Macro Order Blocks represent broader market perspectives rather than solely focusing on specific timeframes.
How to use
Identifying Strong Order Blocks
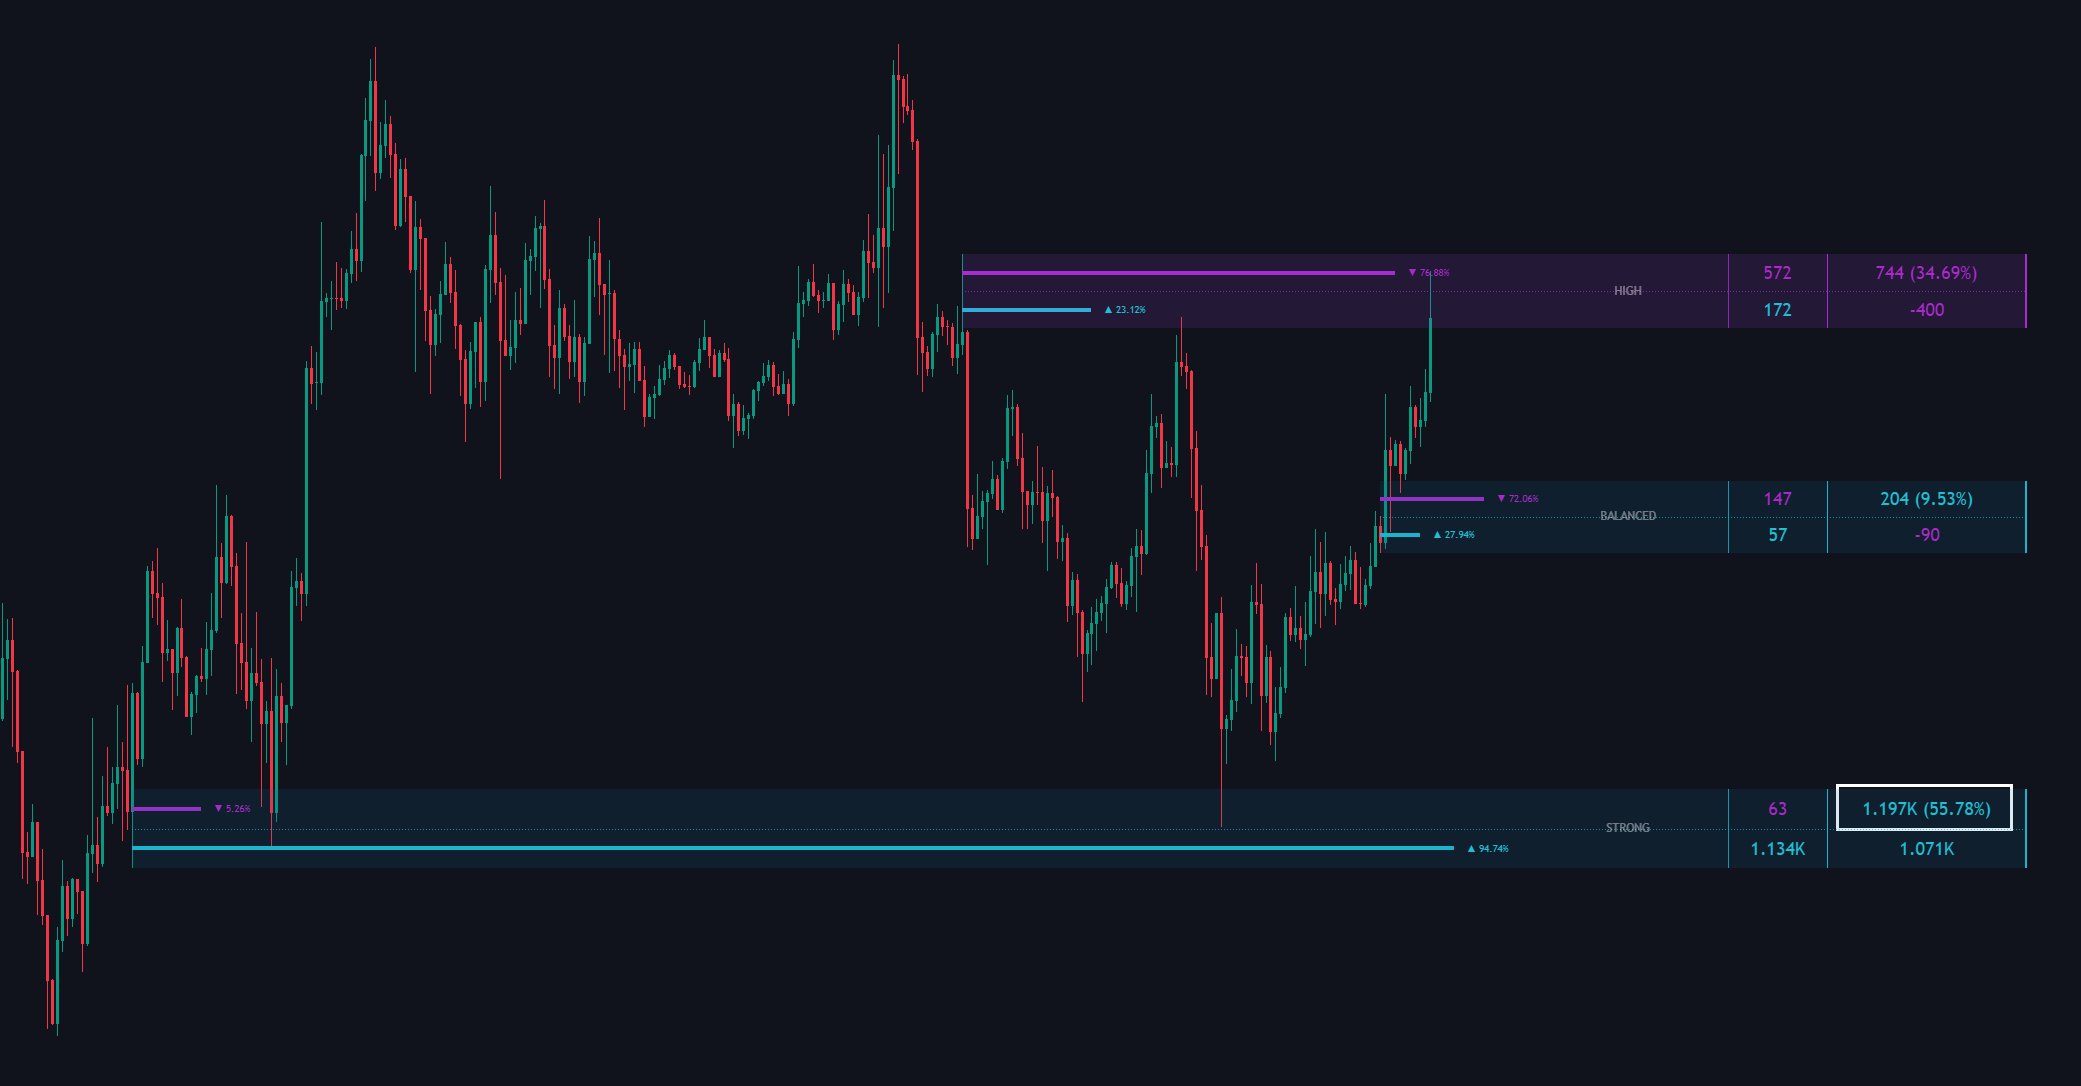
Blocks with a high percentage of total volume are likely to be more significant support or resistance levels. A strong order block with high bearish volume and negative delta (more selling) could act as a substantial resistance zone.
Assessing Potential Reversals
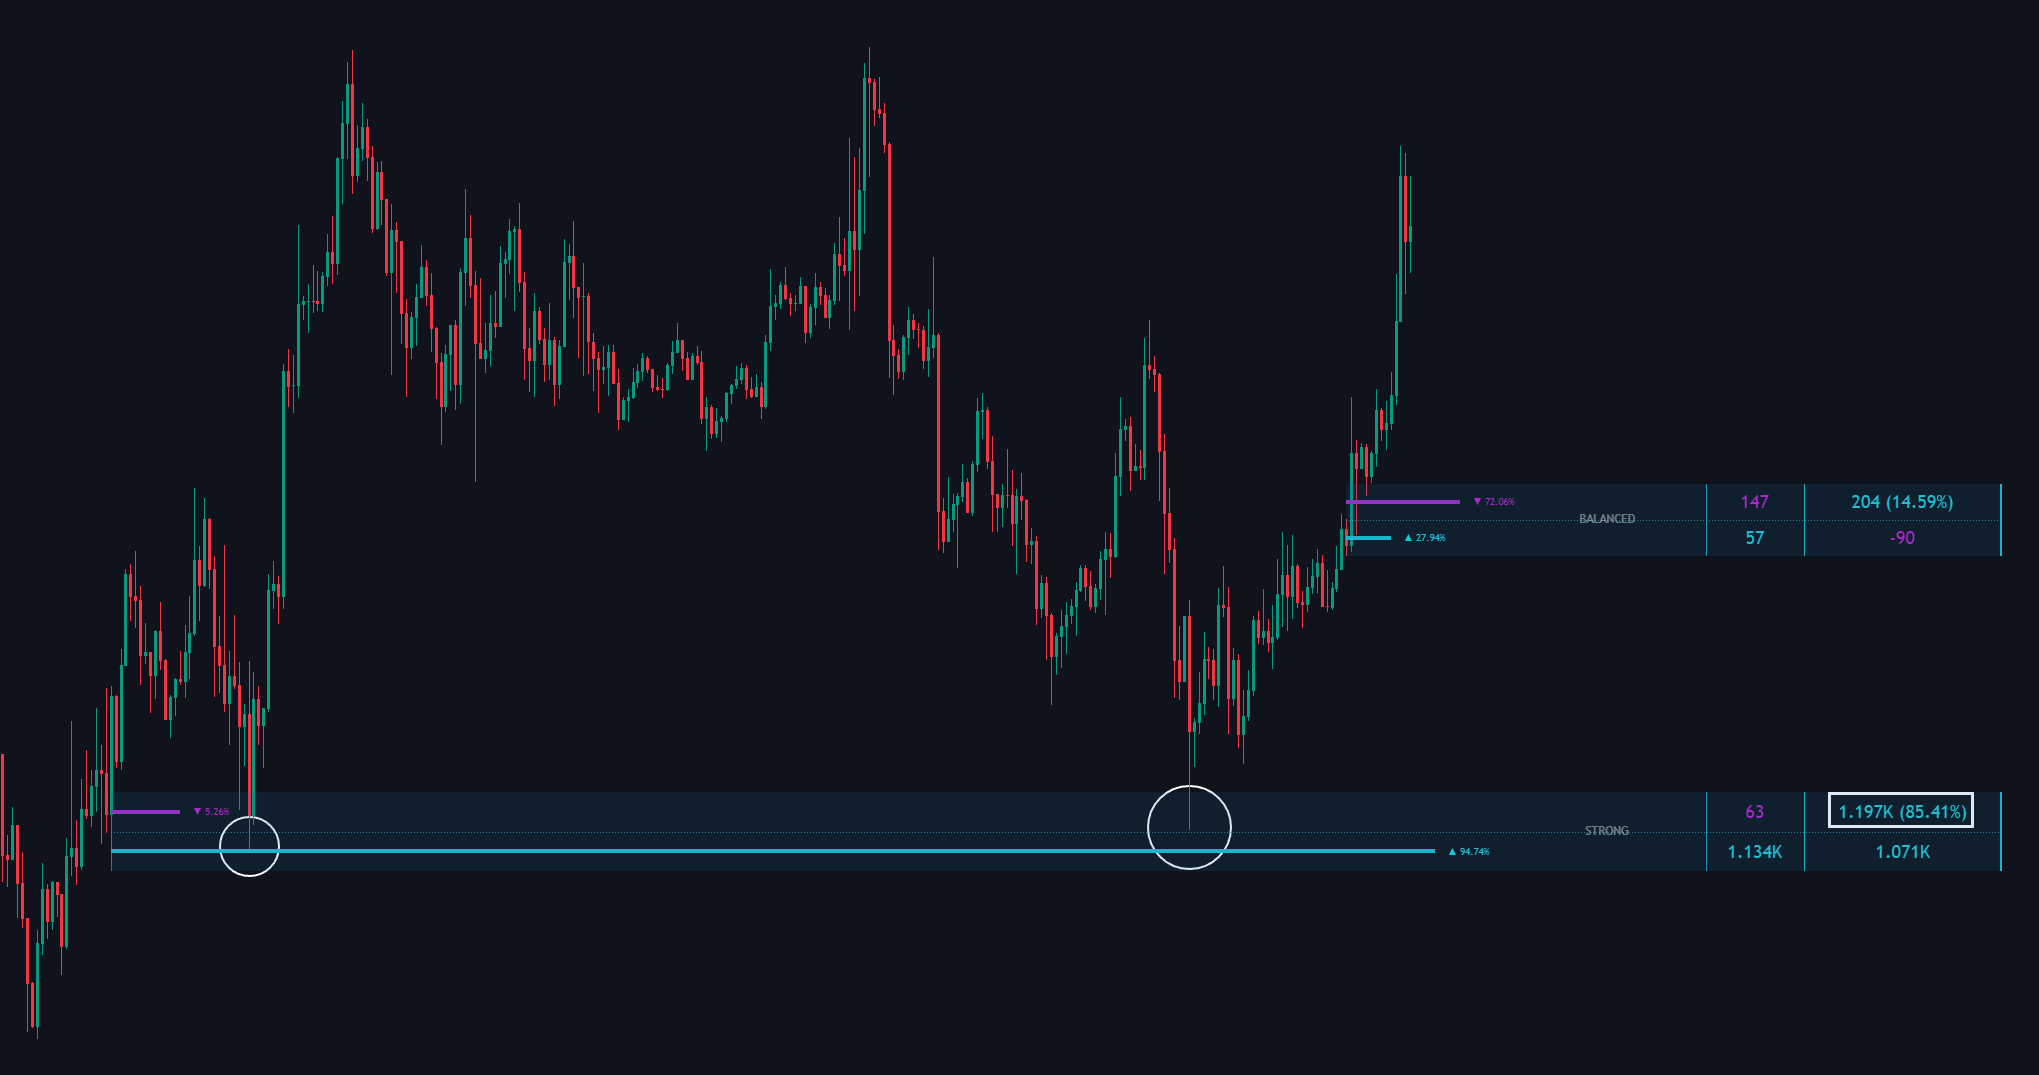
If an order block shows high total volume with a positive delta, it might indicate strong buy interest. This could suggest a reversal opportunity and move price up.
Refining Entries and Exits
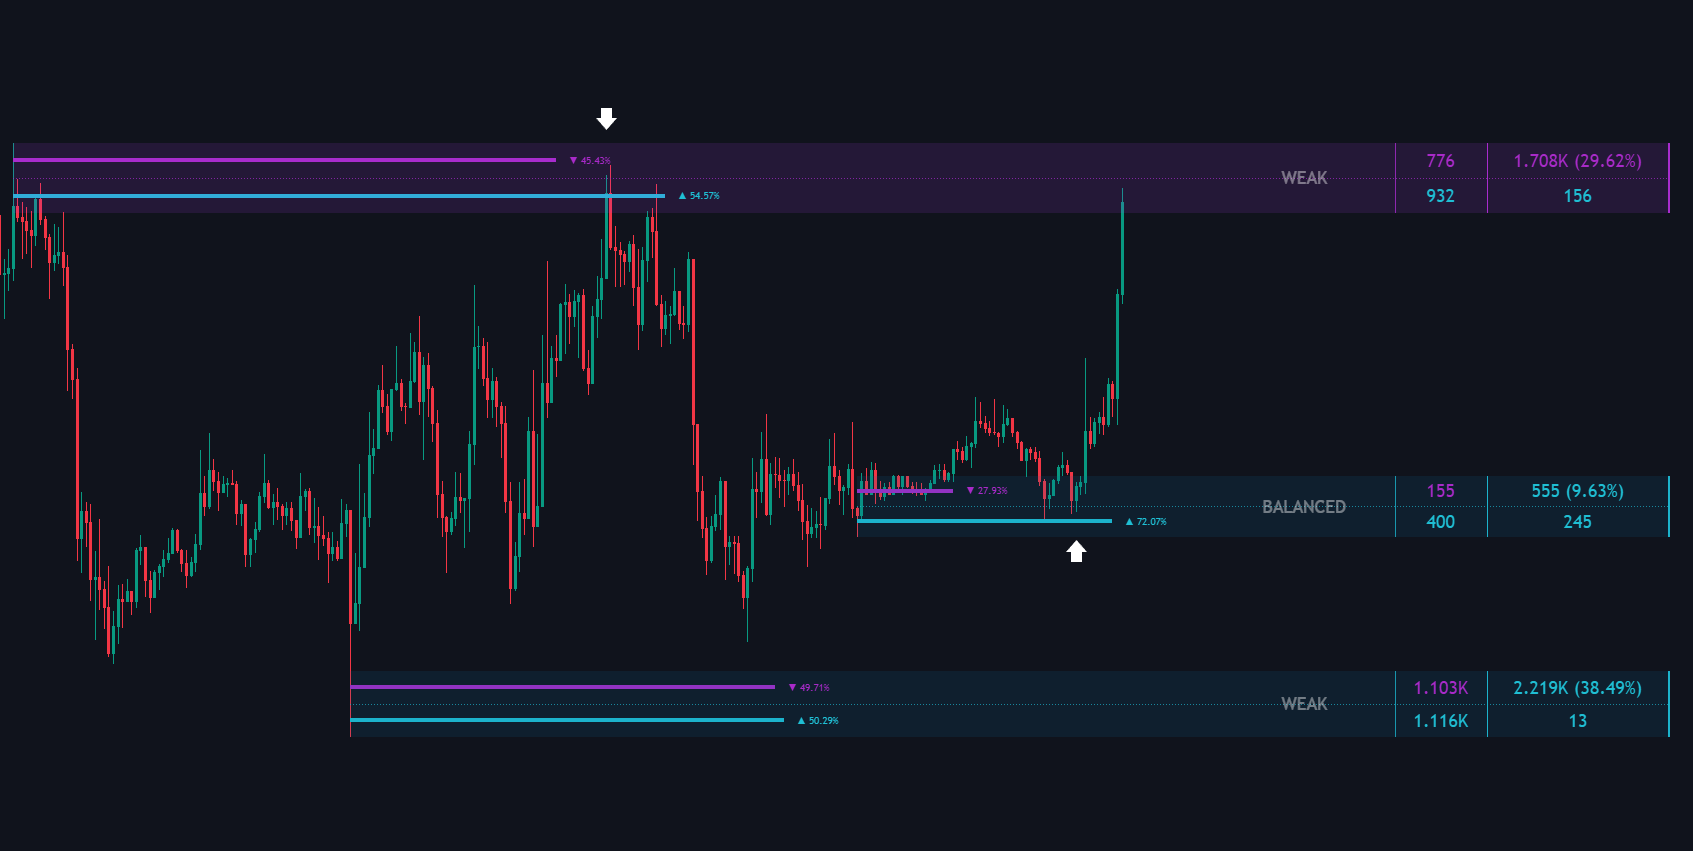
By analysing the delta volume and total volume within order blocks, traders can make more informed decisions on where to enter or exit trades, knowing whether buying or selling pressure dominated at those levels.
The provided Order Blocks are designed to be cleaner in nature and more effective in their detection of key market levels.
Settings
| Setting | Description |
|---|---|
|
|
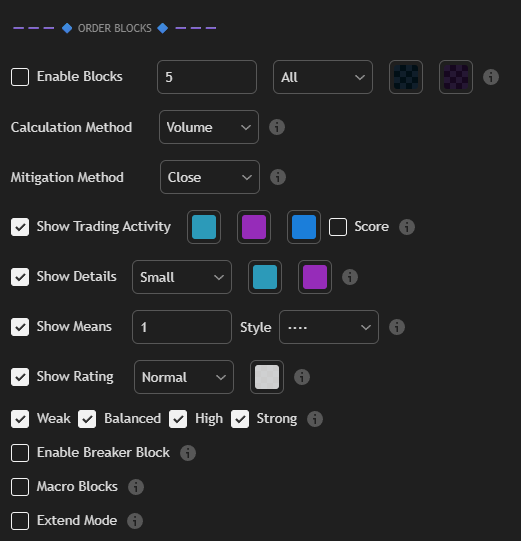
| Calculation Method | This dropdown menu determines the core logic used to identify valid Order Blocks. Changing this setting will shift the focus of the detection algorithm to suit different market environments.
|
| Mitigation Method | Defines when a block is considered "filled": • Touch: Price touches the block boundary. • Wicks: Only wick penetrations count. • Close: Price must close inside the block. • Average: Uses an average-based price calculation. |
|
|
| Show Details | Allows customization of the display size and detail density for metrics. |
| Show Means | Displays the midline of the order block, a common reference for retracements. |
| Show Rating | Assigns visual labels categorizes (Weak, High, Balanced and Strong blocks) for easy identification of significant levels |
| Enable Breaker Block | Identifies zones where previous resistance has flipped to support (or vice versa). |
| Macro Blocks | Enables broader, high-level order blocks for a "big-picture" perspective. |
| Extend Mode | Extends the block visually to the right edge of the chart. |
