> For the complete documentation index, see [llms.txt](https://docs.bigbeluga.org/llms.txt).
> Markdown versions of documentation pages are available by appending `.md` to page URLs; this page
> is available as [Markdown](https://docs.bigbeluga.org/toolkits-pro-plus/market-core-pro/fair-value-order-blocks.md).
# Fair Value Order Blocks
Traditional order block indicators paint every candle with a large body, which leaves the chart
covered in zones that never mattered.
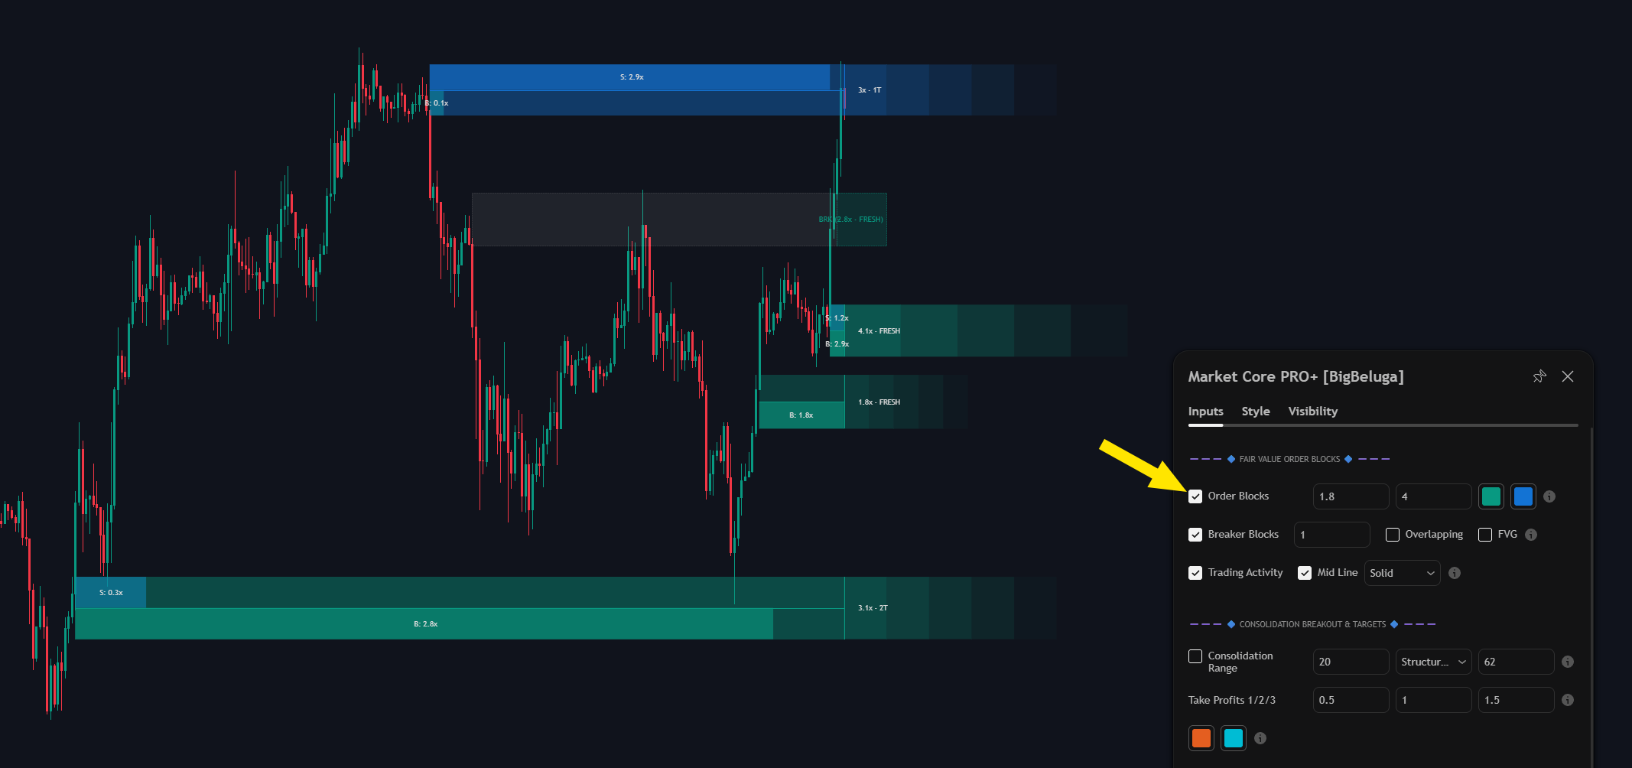
Order block and breaker inputs with trading activity bars and fair value gap detection
Fair Value Order Blocks keep only the blocks that were created by meaningful volume, so a handful of
high-probability zones stay on the chart instead of dozens of noise levels.
## Trading activity inside a block
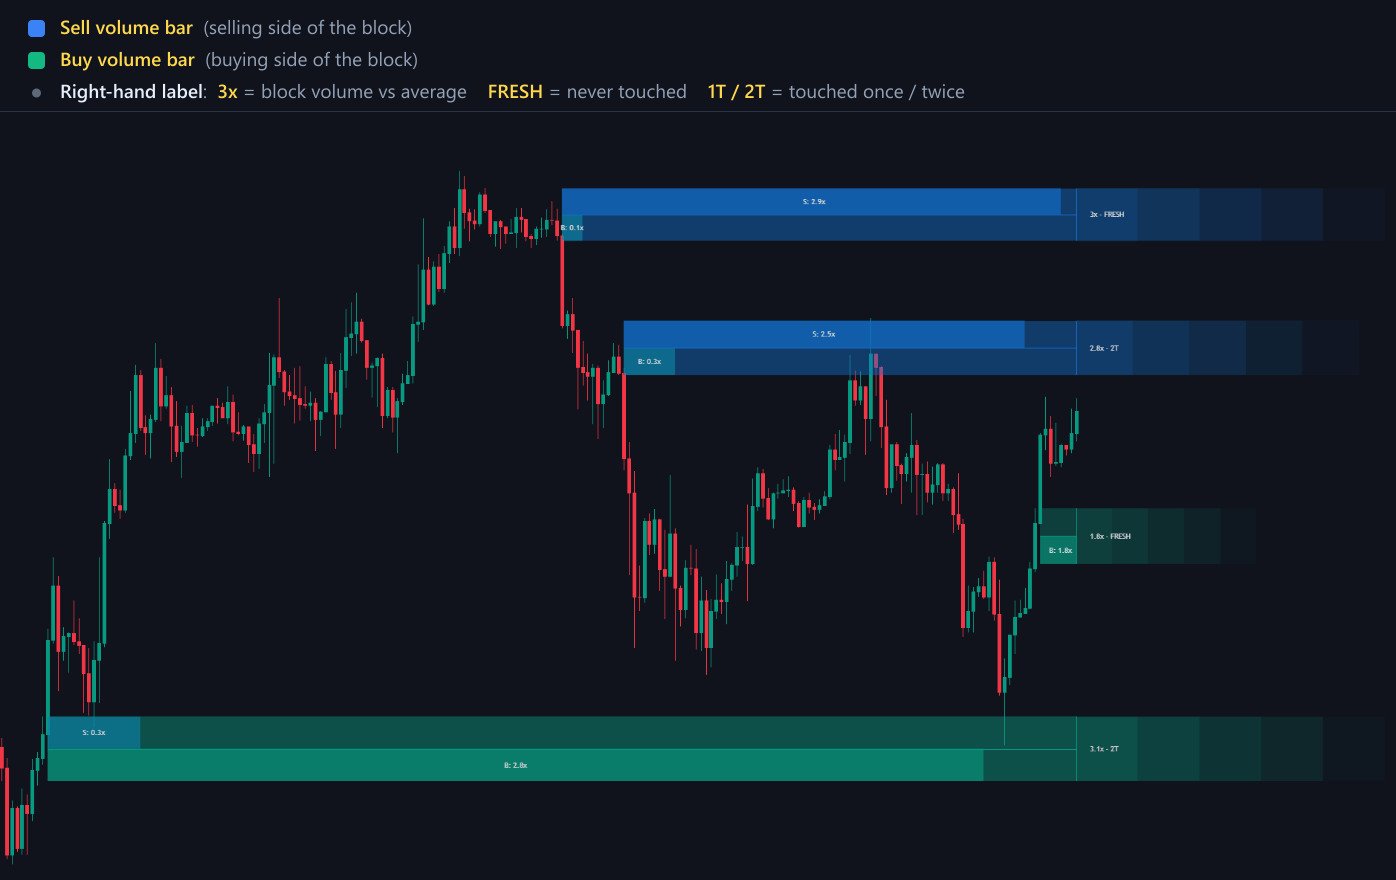
Every active block carries a Trading Activity bar that splits the volume inside the zone into buying
and selling. A block built by aggressive buyers behaves differently on a retest from one that was
simply left behind by a slow drift, and the bar makes that difference visible without opening a
separate volume tool.
Buy and sell volume bars inside a block, with the volume multiple and touch count on the right
The block also reports its age and volume size, so you can tell a fresh zone from one the market has
already worked through.
## Breaker blocks
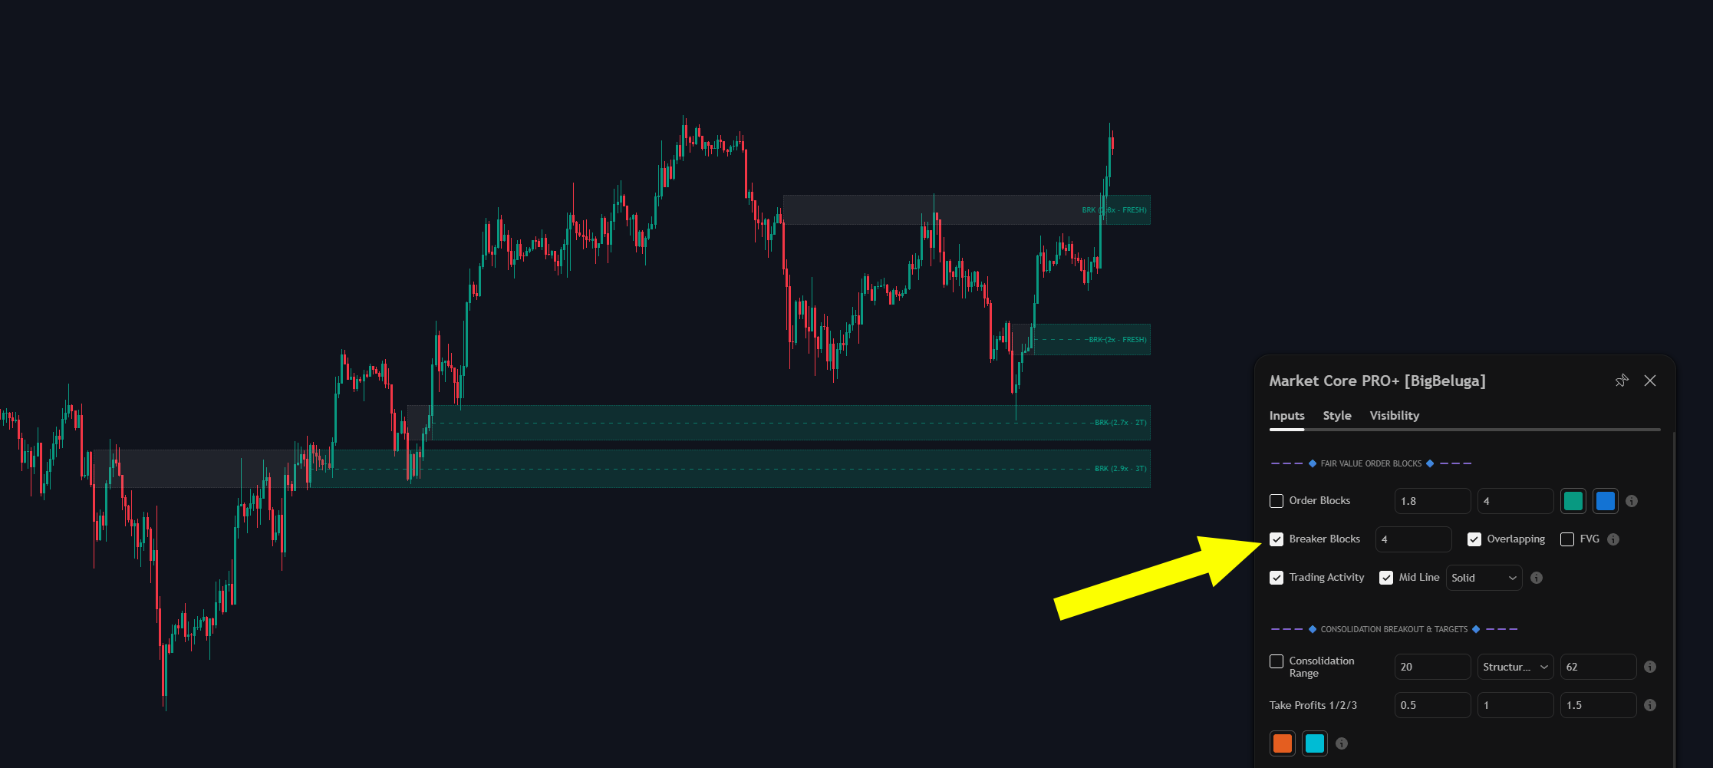
When price closes through an order block, the zone does not disappear — it is re-classified as a
Breaker Block.
Breaker blocks marked on price with the breaker input enabled in the settings
{% hint style="info" %}
A breaker is the flip zone: the level that used to supply now acts as demand, and vice versa. Retests
of that level are often cleaner continuation entries than the original block.
{% endhint %}
## Overlap filter
The overlap filter only affects breaker blocks. When a breaker overlaps an active order block, the
breaker is removed — the same price area is never drawn twice, and the active block stays the one you
read.
## Fair value gaps
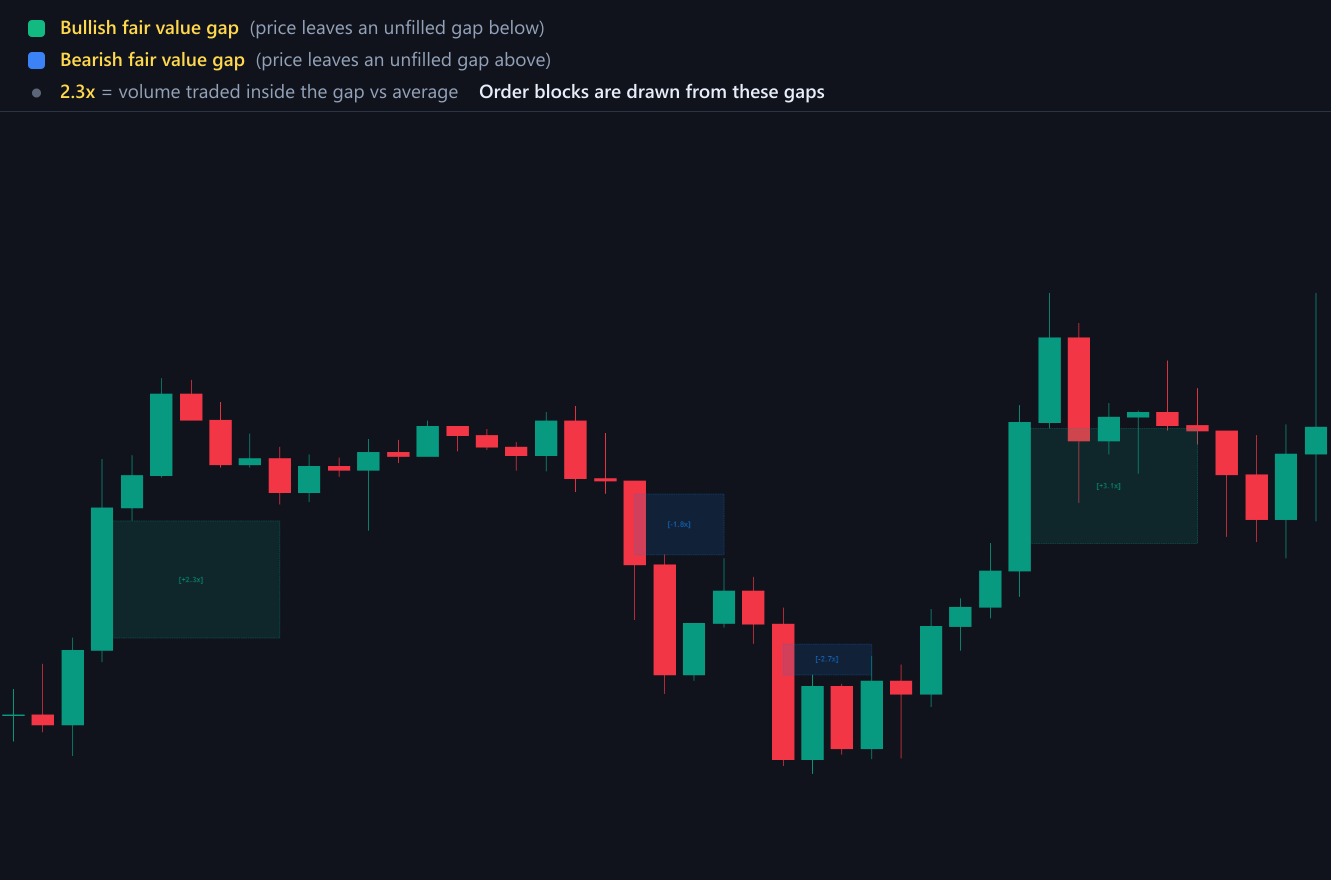
Fair value gaps are the imbalances the order blocks are built from: price leaves a three-candle range
untraded, and the toolkit keeps that gap on the chart.
Every gap carries the volume that traded inside it, written as a multiple of the average. A **2.3x**
label means 2.3 times the average volume was traded inside that gap, which is what separates an
imbalance worth watching from a routine one.
Fair value gaps with the volume traded inside each one, and order blocks drawn from them
Order blocks in Market Core PRO+ are drawn from these gaps, so the block layer and the gap layer
always describe the same imbalance.
## Settings
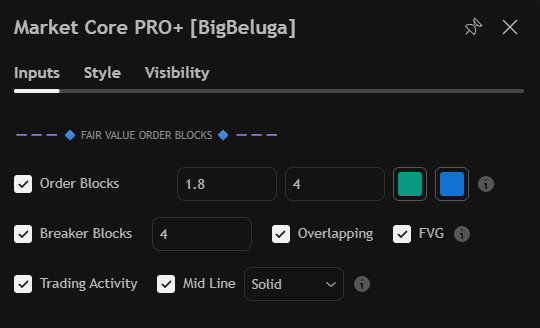
The Market Core PRO+ fair value order block inputs
| Settings | Description |
| -------------------- | --------------------------------------------------------------------------------------------- |
| Order Blocks | Enable the block layer, set its volume threshold and how many active blocks stay on the chart. |
| Breaker Blocks | Enable breakers and limit how many remain visible. |
| Overlapping | Remove breaker blocks that overlap an active order block. |
| FVG | Display fair value gaps together with the volume traded inside each gap. |
| Trading Activity | Show the buy and sell split inside every active block. |
| Mid Line | Style of the line drawn through the middle of each block. |
| Block colours | Separate colours for bullish and bearish blocks. |