> For the complete documentation index, see [llms.txt](https://docs.bigbeluga.org/llms.txt). Markdown versions of documentation pages are available by appending `.md` to page URLs; this page is available as [Markdown](https://docs.bigbeluga.org/main-toolkits/market-core-pro-tm/price-action-concept.md).
# Price Action Concept
## FIBONACCI RANGES
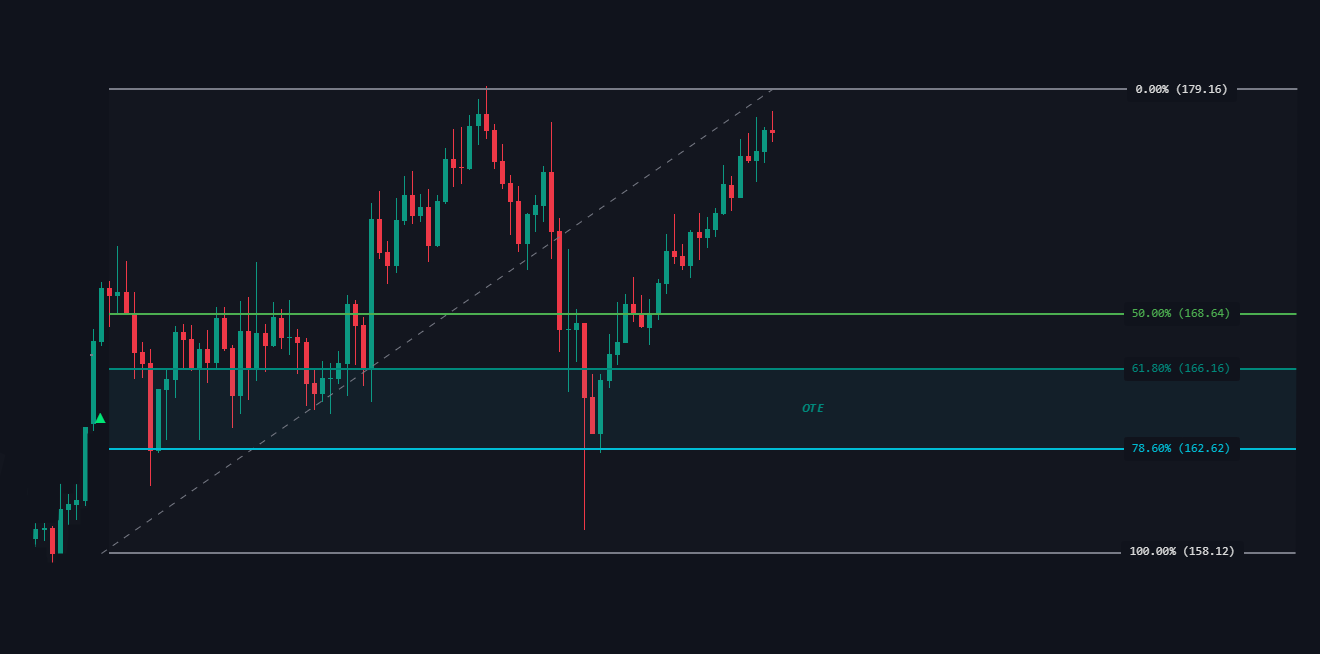
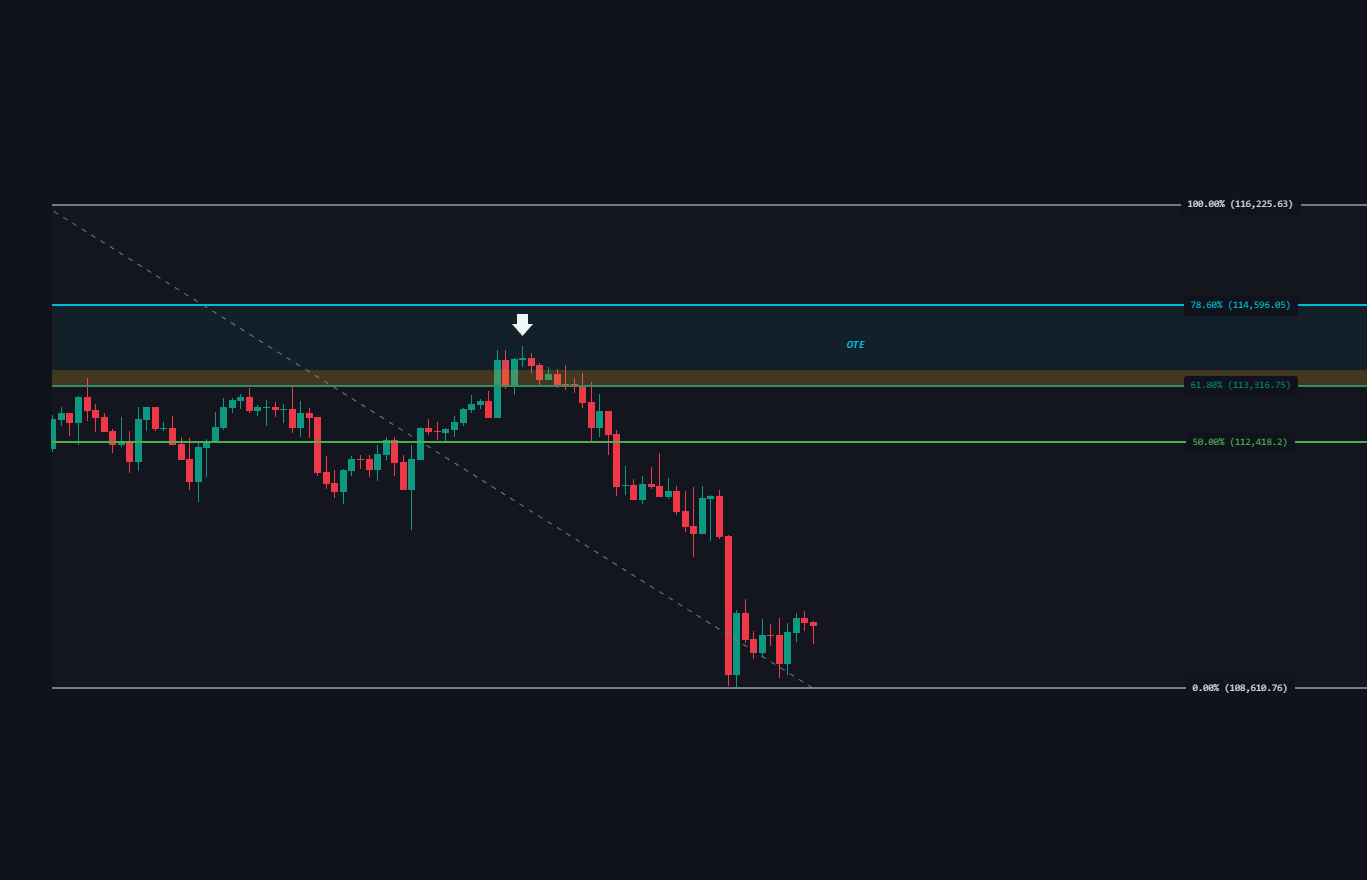
Fibonacci Ranges with OTE (Optimal Trade Entry) are powerful tools for identifying high-probability trade entries within key retracement levels, offering opportunities for reversals or trend continuations.
### Fibonacci Levels
Key levels are 61.8% and 78.6%, which form the OTE zone, where reversals or continuations are likely.
Levels
### Trend Positioning
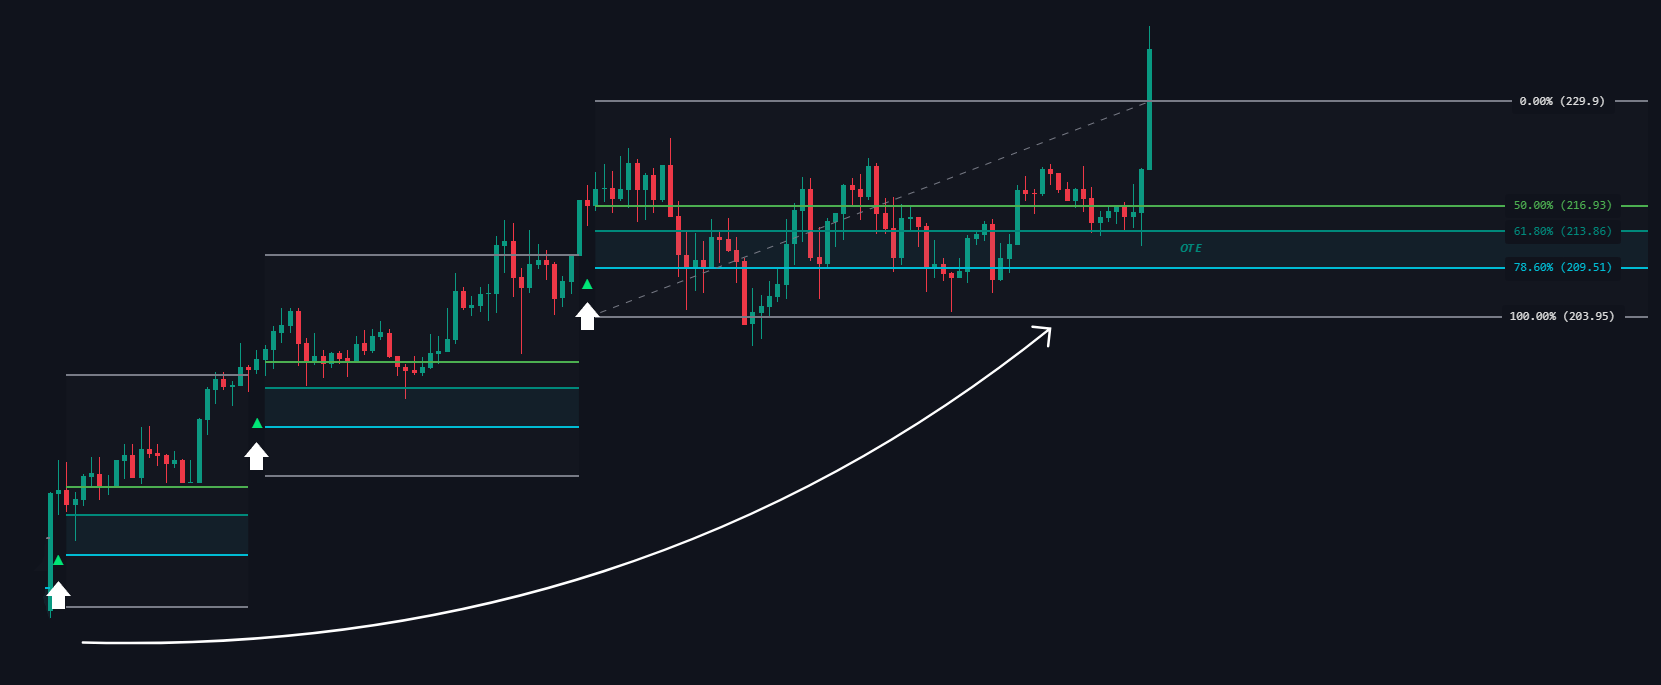
**Uptrend**:
After a break above a range, the OTE zone lies below the midpoint of the new range, suggesting a buy zone.
Uptrend
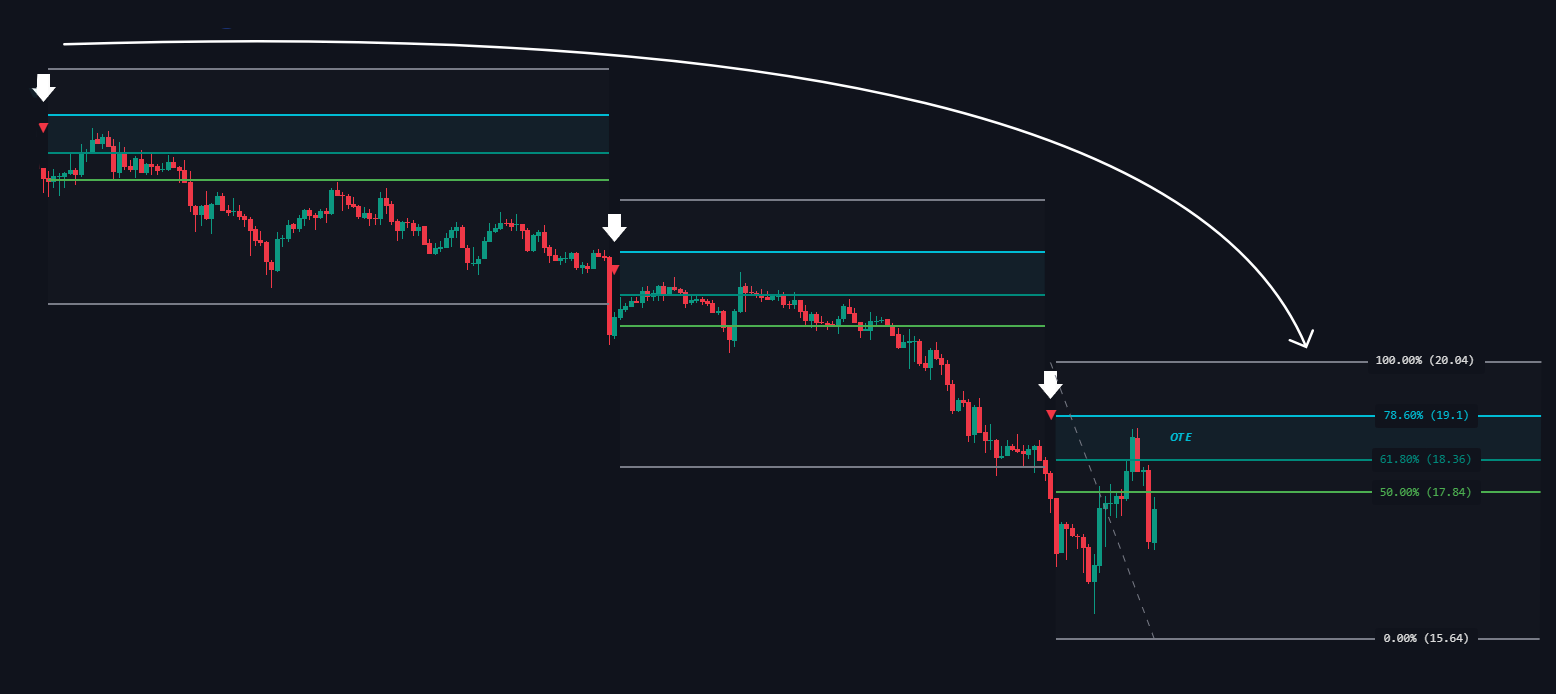
**Downtrend**:
After a break below, the OTE zone lies above the midpoint, suggesting a sell zone.
Downtrend
### **Labels**
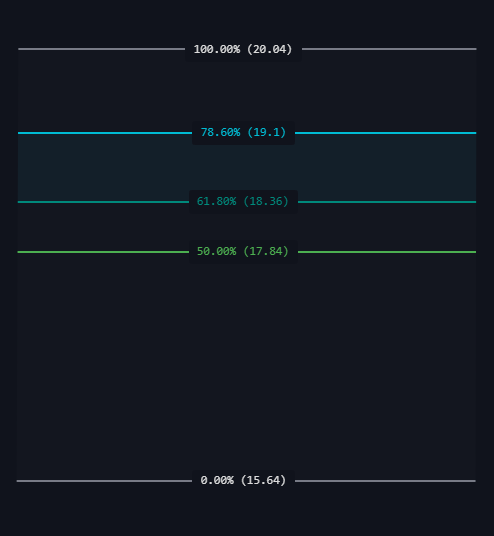
The indicator marks these Fibonacci levels with prices, making it easy to spot the OTE area for entries aligned with the trend.
Labels
{% hint style="info" %}
In essence, OTE within Fibonacci ranges provides ideal retracement levels for trend-aligned trades.
{% endhint %}
### Golden Pocket (61.8%–65% Zone)
The **Golden Pocket** is the most significant Fibonacci retracement zone, located between the **61.8%** and **65%** levels.
{% hint style="info" %}
It is widely used in institutional trading models because it represents the optimal retracement point where price most often reacts before continuing its primary trend.
{% endhint %}
## Premium and Discount
Premium & Discount
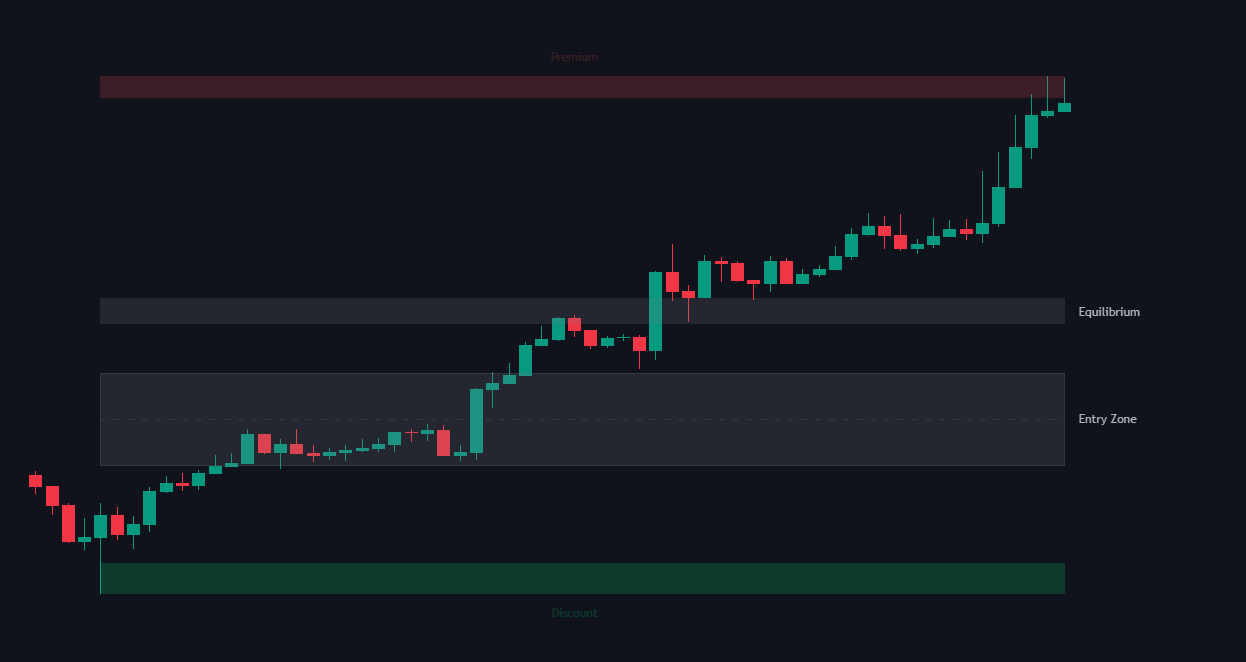
To understand **Premium** and **Discount** zones, it's essential to first grasp the concept of **Equilibrium**:
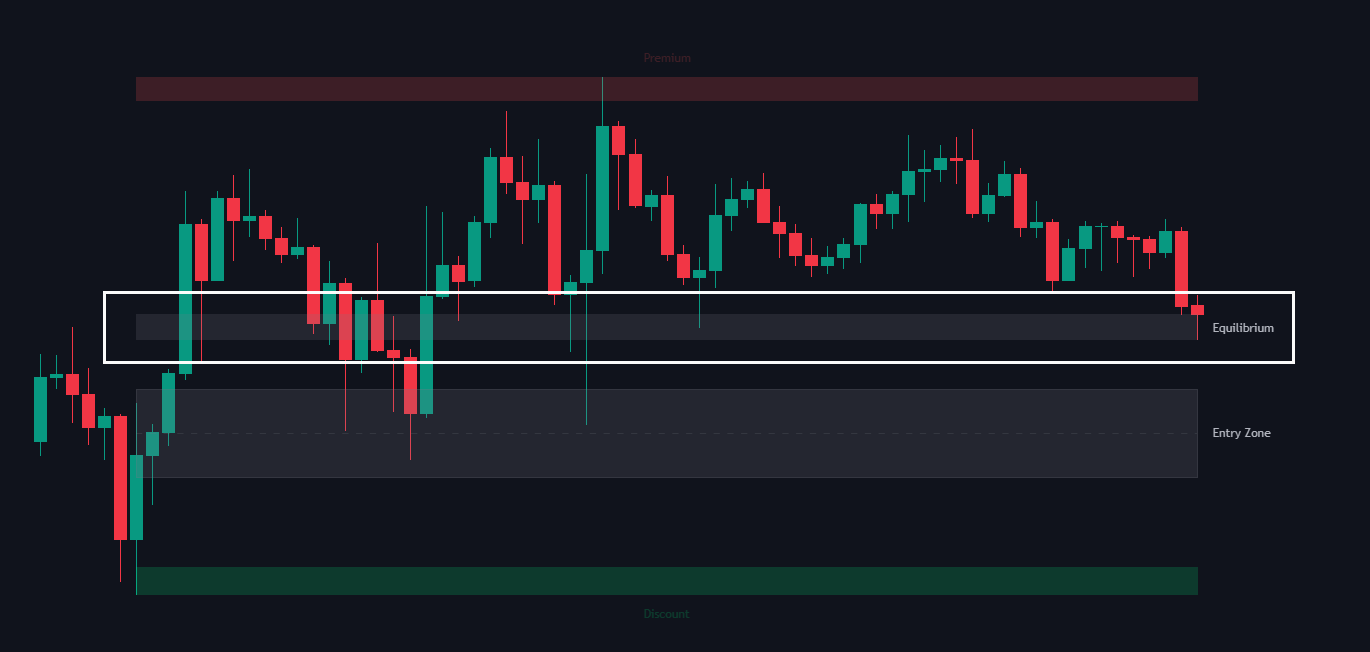
### Equilibrium (Fair Value)
This is the midpoint of a selected price range, representing the "fair value" within that range. It serves as a reference point to determine whether the price is in a **premium** or **discount** zone.
Equilibrium
### Premium Zone
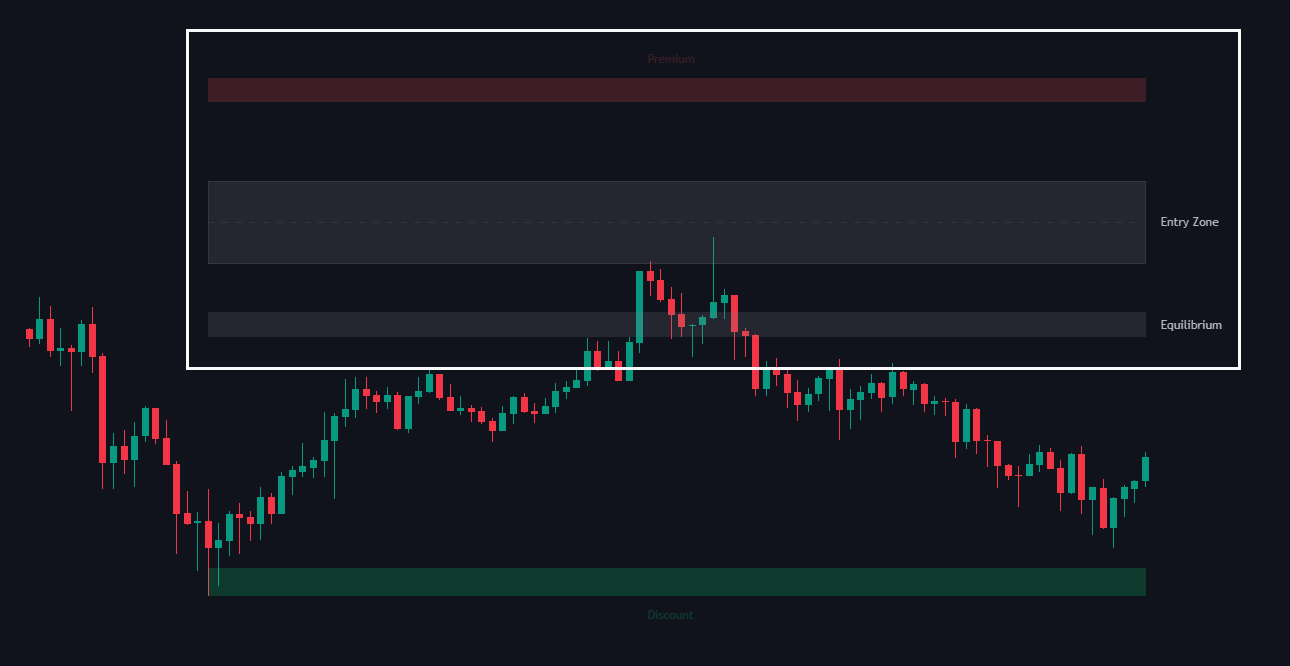
The area **above the equilibrium**. Prices in this zone are considered overvalued relative to the range.
Smart money and ICT (Inner Circle Trader) traders often look for **sell opportunities** in the premium zone, especially in a downtrend or after a significant upward movement.
Premium Zone
### Discount Zone
The area **below the equilibrium**. Prices in this zone are considered undervalued. Traders typically look for **buy opportunities** here, especially in an uptrend or after a downward movement.
Discount Zone
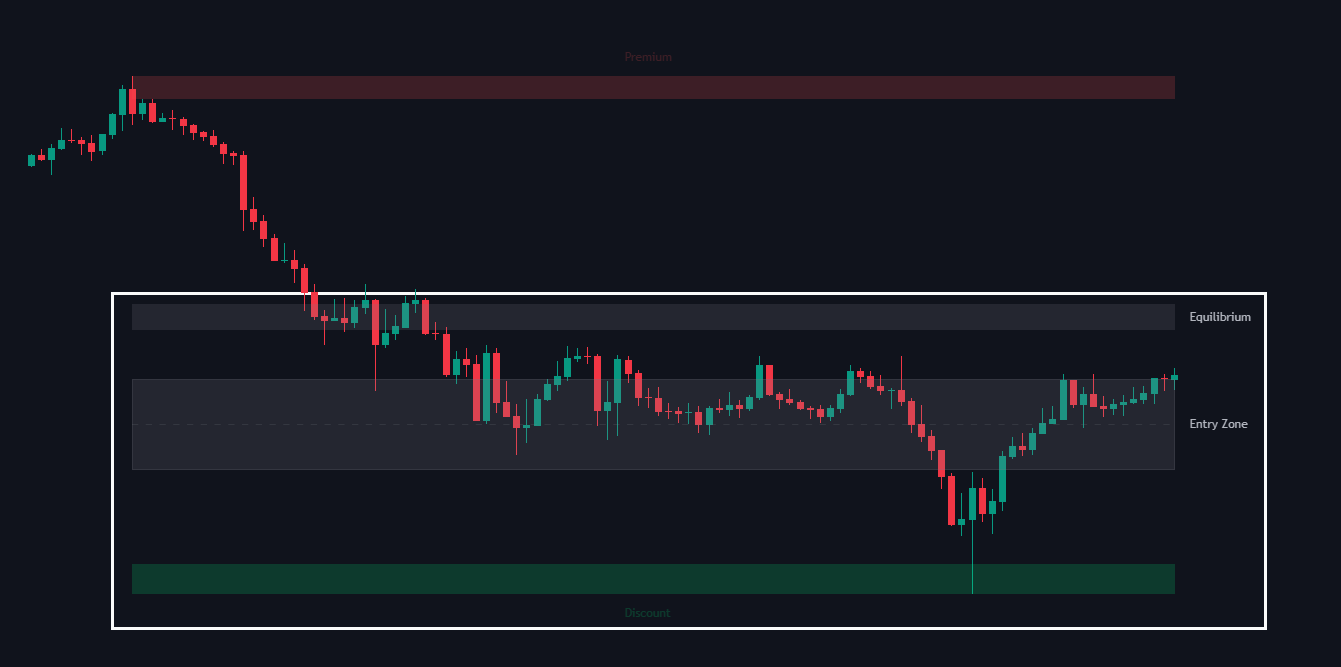
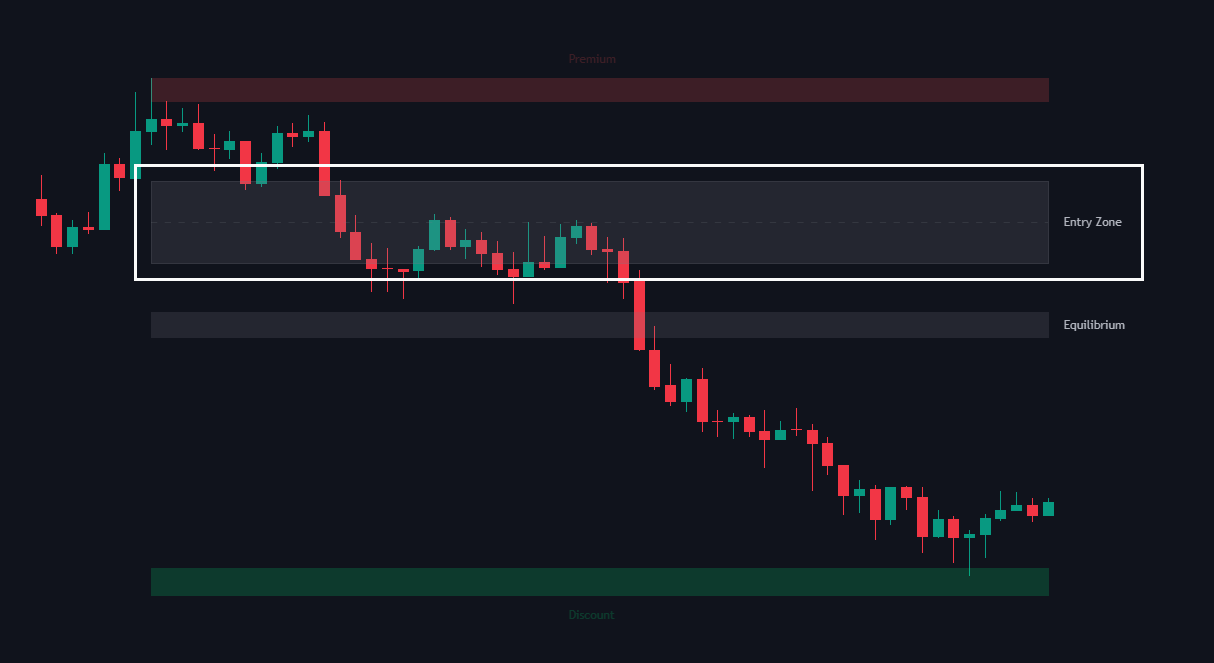
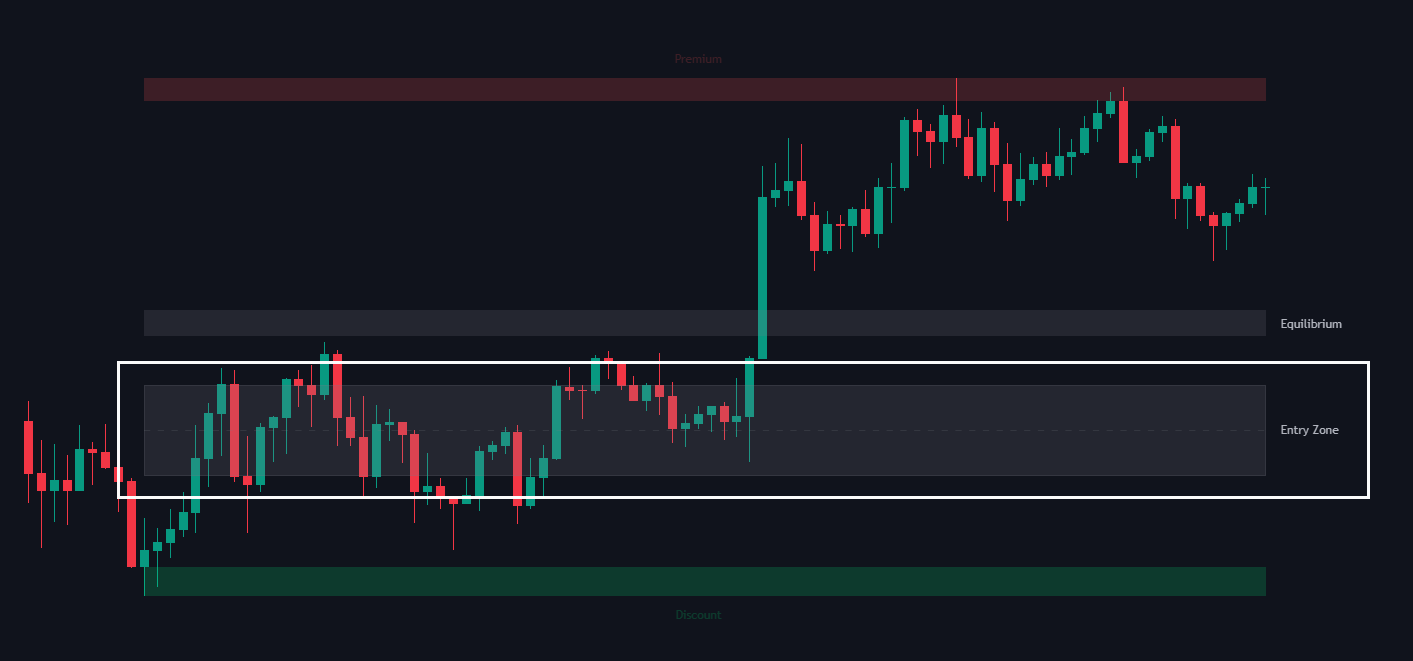
### Entry Zone
Marks the preferred area for entering a trade within the trend. In an uptrend, the entry zone lies in the discount zone below equilibrium; in a downtrend, it’s in the premium zone above equilibrium.
Entry Zone (Above)
Entry Zone (Below)
## Settings
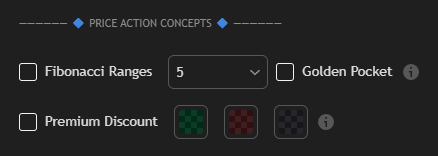
These settings allow traders to enable different **price action-based tools** within the indicator:
| Settings | Description |
| ---------------- | --------------------------------------------------------------------------------------------------------------------------------------------------------------------------------------------------------------------------------------------------------------------------------------------------------------------------- |
| Fibonacci Ranges |
Enables automatic plotting of Fibonacci retracement levels based on recent price movements.
The dropdown menu (default: 5) selects the number to change length calculation.
Golden Pocket: Enables automatic detection of the golden pocket area
|
| Premium Discount |
Highlights areas of the chart based on the premium (overpriced) and discount (underpriced) zones.
Users can customize the colors for different sections (green for discount, red for premium, dark for neutral).